
This walkthrough guide highlights relics related to the 1845 Franklin Expedition in Polar Worlds, a gallery in Greenwich’s National Maritime Museum.
For the drama series The Terror, Allegra Rosenberg has assisted me throughout by noting which relics appear in the television series. [There are some (mild) spoilers.]
This guide is one piece of the overall Franklin Expedition Guide to London (link).
This article (and others on this website) owes a debt of gratitude to Jeremy Michell, Scarlet Faro, and Claire Warrior at Royal Museums Greenwich, each of whom I have found faultlessly helpful and kind. Relevant links to their artifact webpages are given in each item description.

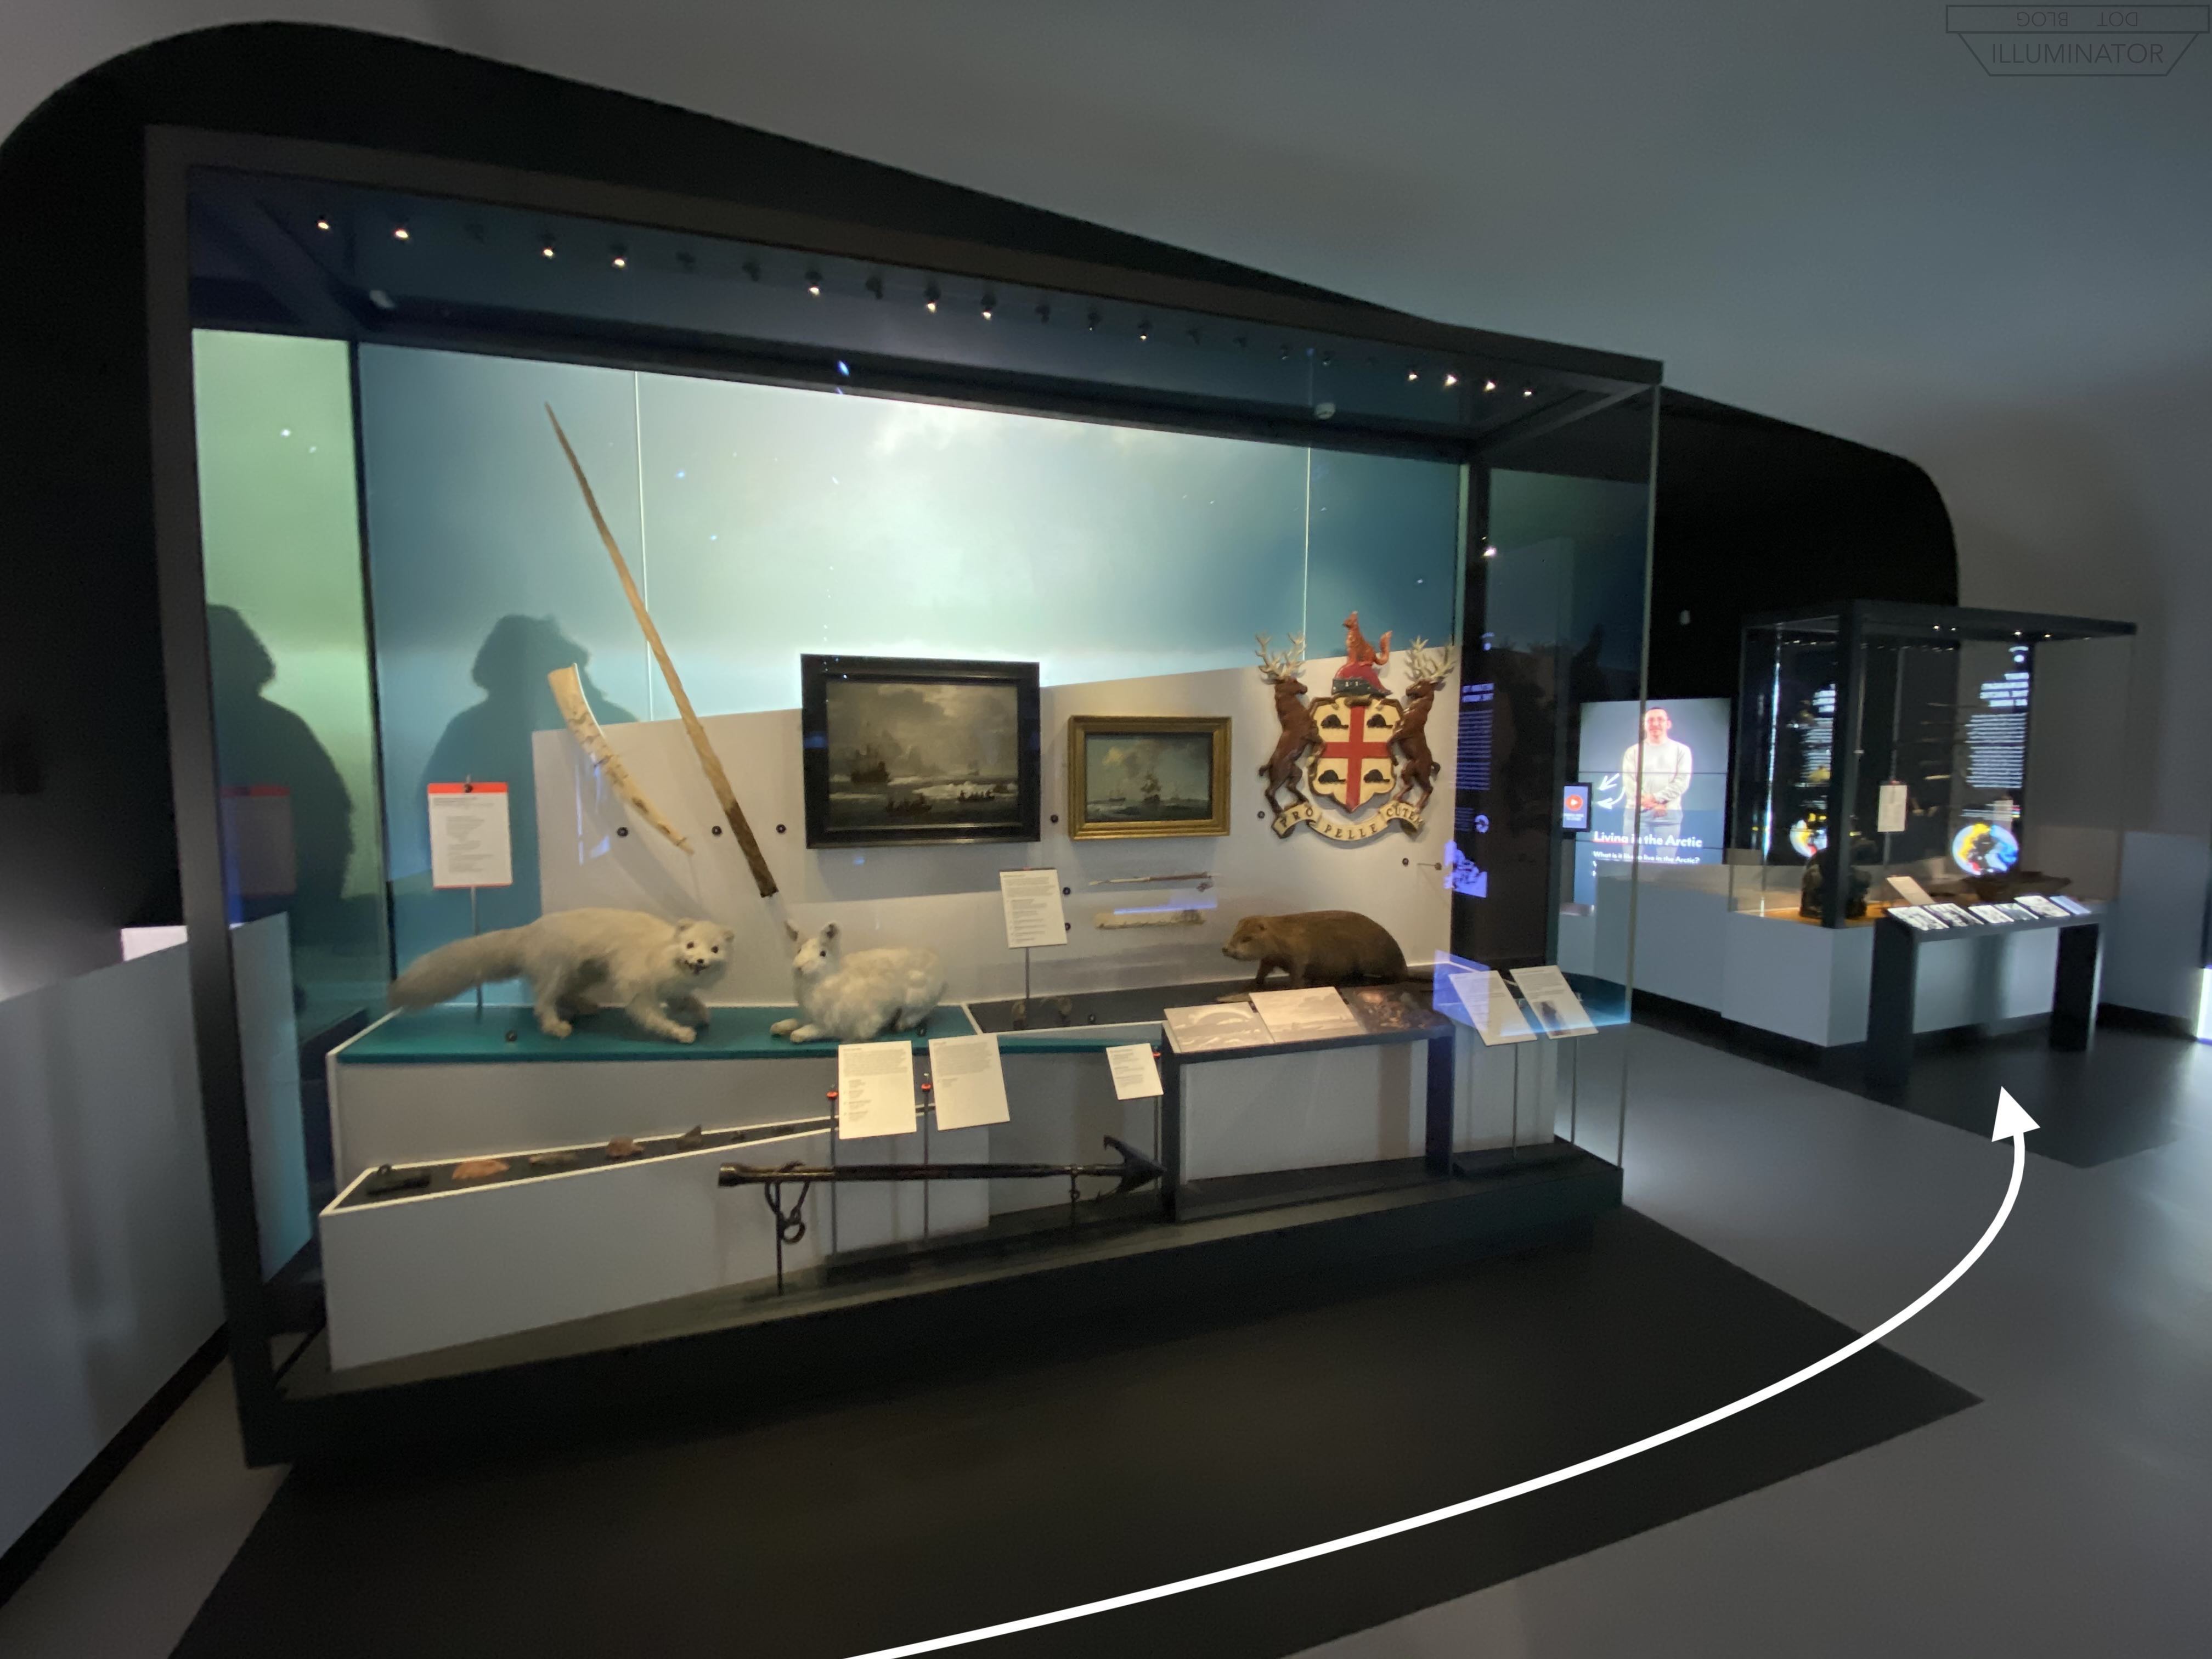
Enter Polar Worlds...


Coming around the first corner, the 2nd and 3rd paintings on the wall are of Erebus and Terror. Both are scenes during James Clark Ross’ Antarctic expedition, during which Francis Crozier had again been captain of HMS Terror.

Curl around and look back into the first cabinet...
Curl around and look back into the first cabinet...
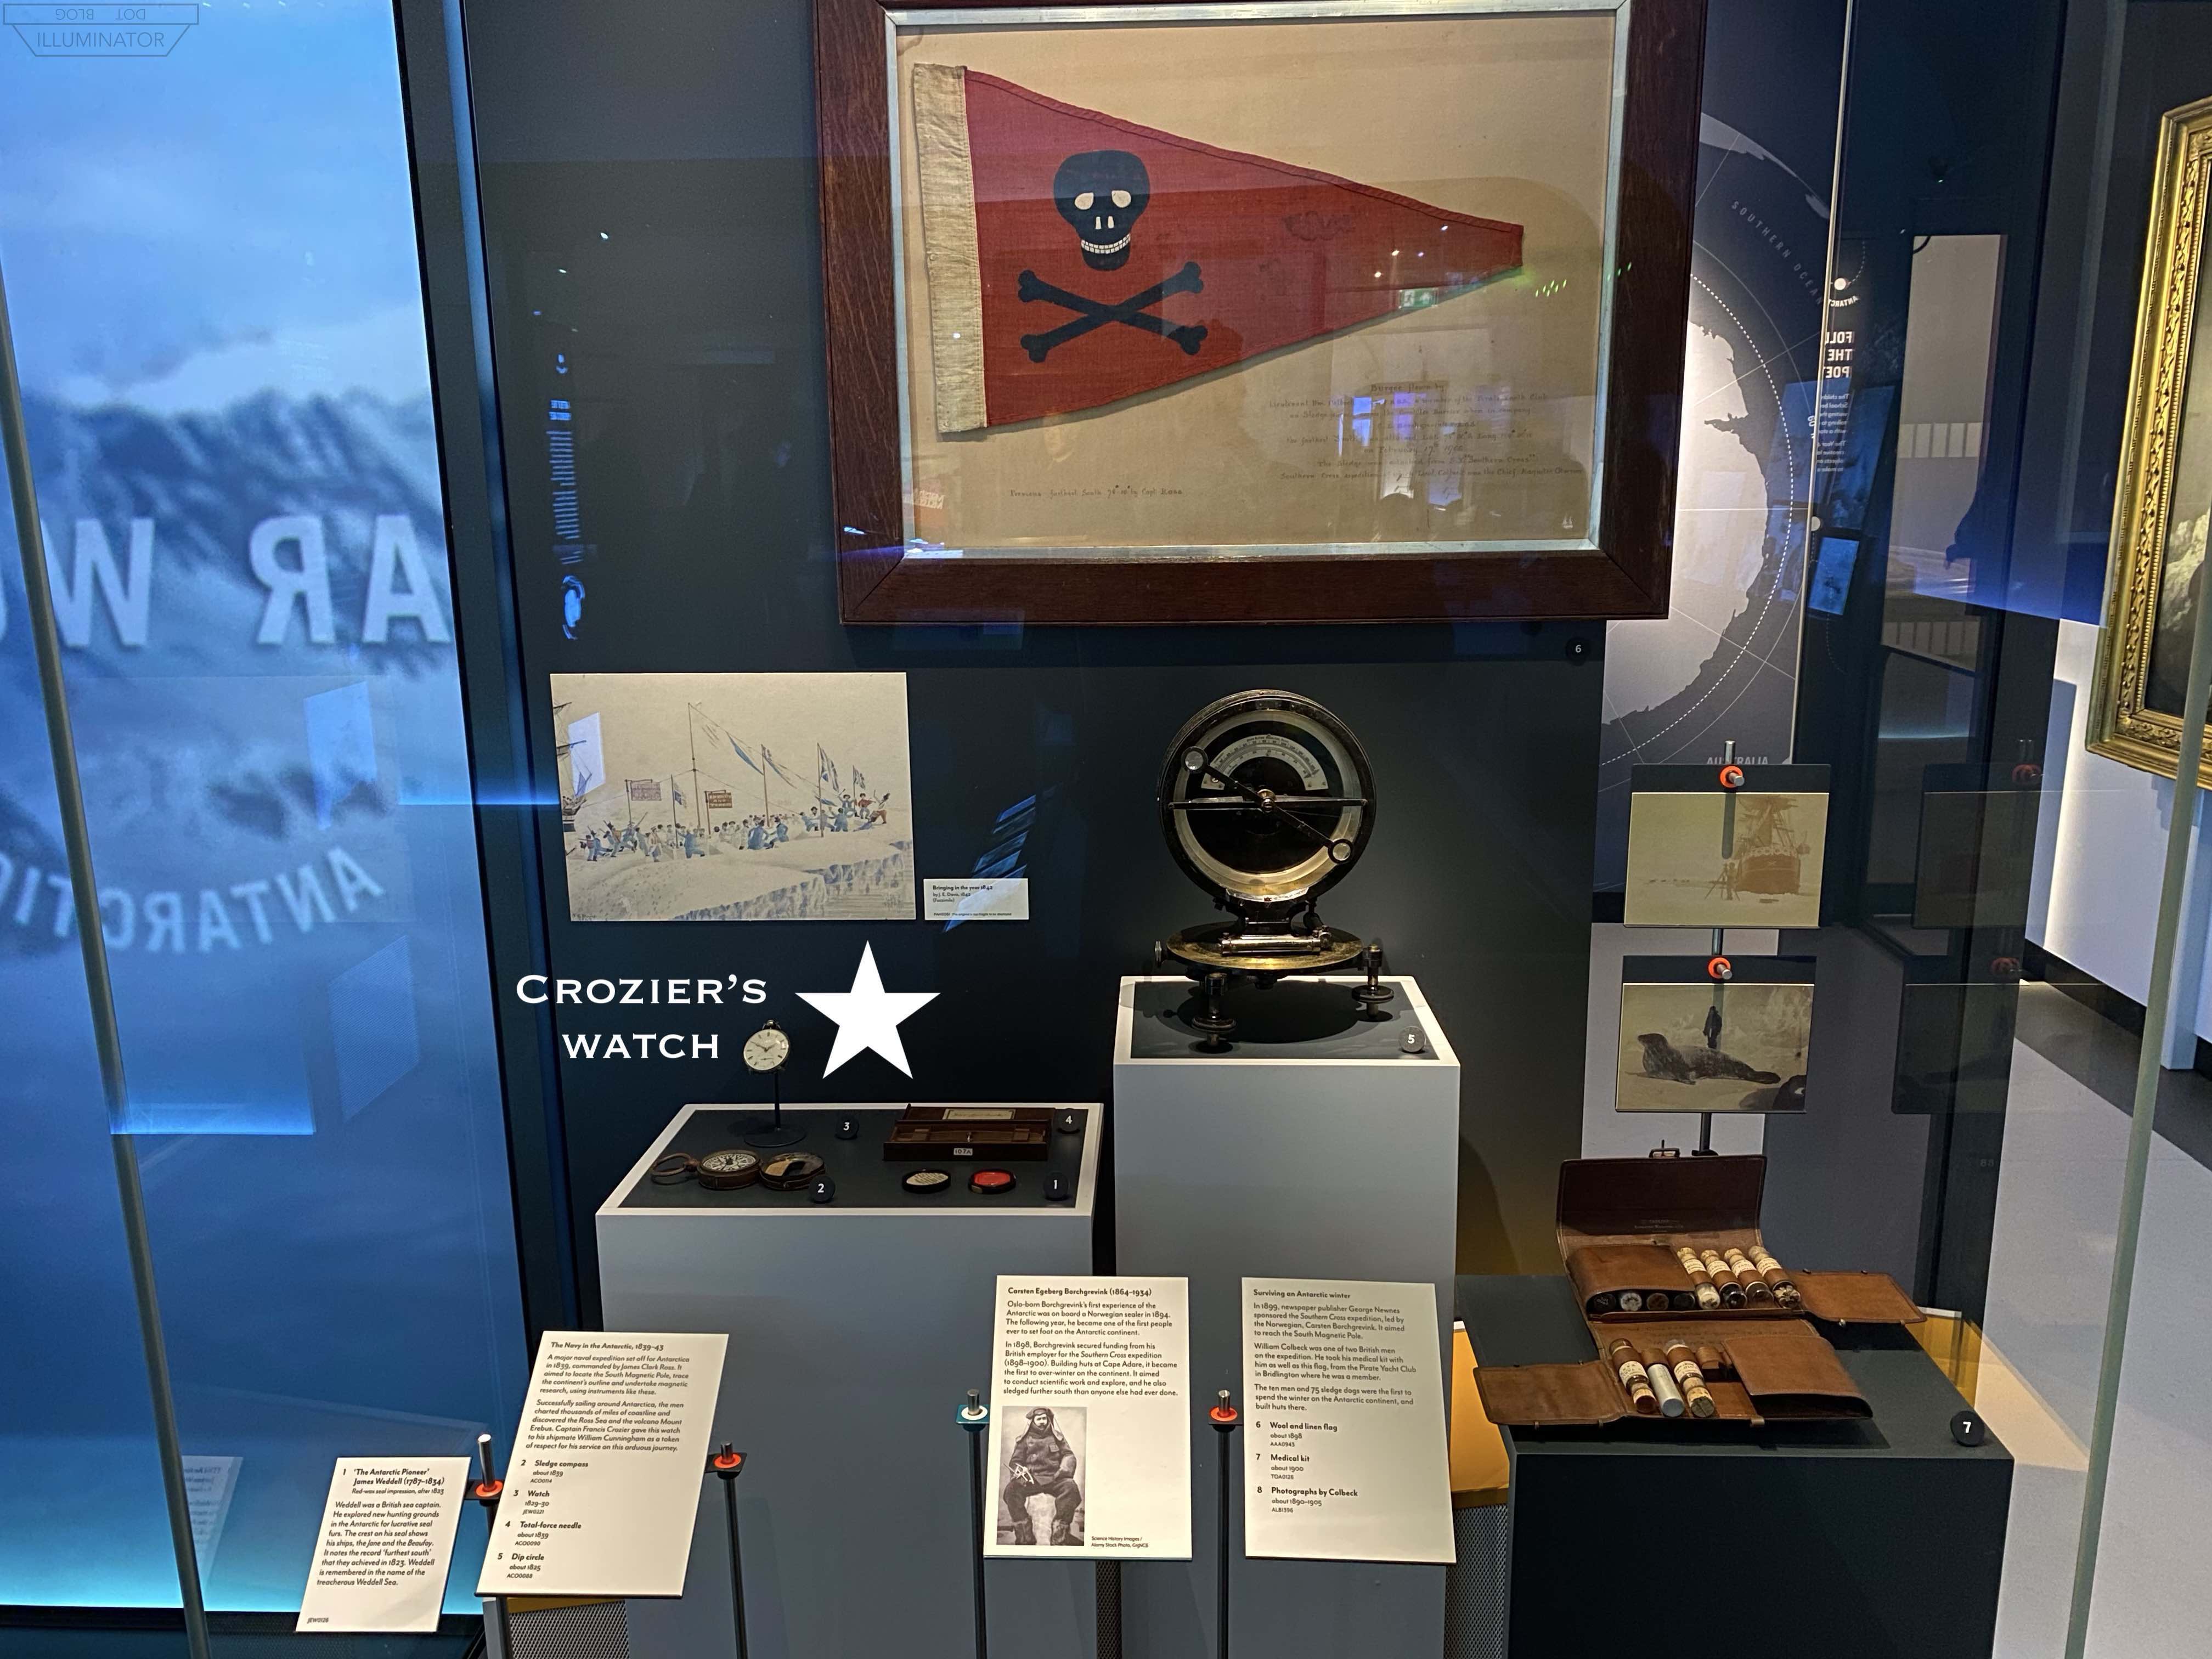
Crozier’s silver watch. (link to Greenwich)
On the left is the silver watch kept for 15 years by Capt. Francis Crozier. After the Antarctic expedition, Crozier gave his watch to a man who had served under him on HMS Terror, William Cunningham. There is an inscription on the watch detailing this, plus the image of a barefoot woman leaning on an anchor (though neither are visible here).


Bringing in the year 1842 watercolor. (link to image at Greenwich)
The watercolor sketch (above Crozier’s watch in the cabinet) depicts a New Years party thrown on the ice by Captains James Clark Ross and Francis Crozier near Antarctica. One of the signs at the party says, “Erebus and Terror.” The party featured Crozier dancing with “Miss Ross” in drag, and a statue of “Venus de Medici” carved out of the ice.
In The Terror series: Allegra Rosenberg notes that while we never see Crozier’s watch in the series, we do see the watch chain on his vest – both while he’s on Terror in the Passage, and also in the proposal scene with Sophia Cracroft (episode 4). The party in the watercolor sketch was an element of how Royal Navy captains maintained morale on Arctic/Polar voyages; in The Terror series, Capt. Fitzjames’ Carnivale (episode 6) is a depiction of this tradition, some version of which would have occurred on the lost expedition.


Backing away from Crozier’s watch, the second of those two paintings requires some explanation.
‘Erebus’ and ‘Terror’ in the Antarctic. (link to Greenwich)
Above, left.
HMS ‘Erebus’ passing through the chain of bergs, 1842. (link to Greenwich)
Below. This painting depicts a disaster at sea that occurred during Ross and Crozier’s Antarctic expedition. A close pack of icebergs forced Erebus and Terror to ram each other, the ships tearing each other apart as they collided. Terror finally escaped, exiting a narrow gap in the bergs into calm water, but Erebus was still trapped. Throughout the journey Ross had had to wait for Crozier’s slower ship, but now the roles were reversed, as Crozier waited to see if Ross’ ship would emerge at all.

The painting shows the moment when Erebus finally exited the bergs herself (in the foreground), her sails in disarray and her bowsprit snapped off. In the distance we see Terror waiting, shining a light. This light was Crozier’s signal that Terror was safe, as they waited to receive the same signal from Ross’ Erebus in return.
It’s hard to believe that these are the same men, on the same expedition, that we saw in the New Years party watercolor above Crozier's watch. The two events occurred just a few months apart.

Terror shines her light. (Detail of the above painting.)
[Michael Palin does an excellent long discussion of this event (link to that excerpt) in his audiobook on Erebus. To tell the story, he relies heavily on Cunningham’s journal – the same man on Terror who Crozier would afterwards gift his watch to.]
When the Erebus and Terror shipwrecks were found by Canadians on the Arctic seafloor, they were eerily similar to what we see here: Erebus, sustaining more damage, had once again lost her bowsprit, while her sister Terror again kept hers intact.


Head deeper in, hugging the left wall...

On the way to the next cabinet (left-hand side), note the 1875 ice saw on the ceiling (right-hand side). This one is not Franklin-related, but is an impressive Victorian example of the real thing. In The Terror series, an ice saw is seen being used from a tripod in episode 1 (link).

HMS Resolute was a Franklin search ship, abandoned deep in the Arctic when the Royal Navy gave up searching for Franklin.
Her story continued. She sailed herself as a ghost ship out of the Northwest Passage, was recovered by whalers, sold to the Americans, gifted to Queen Victoria, and finally broken up for timber. Here we see the Resolute’s timber fashioned into a wooden knife and a box as souvenirs. Several other souvenirs of the search ship Resolute’s timber still exist – such as “the Resolute Desk” in the Oval Office, a schematic of which is seen above the knife.

Franklin search ship HMS Resolute, flying the American flag before being gifted to Queen Victoria. (link to image source)

Who accomplished more for Arctic exploration? John led three expeditions, then Jane despatched four or five of her own.
Chronometer Arnold 294. (link to Greenwich)
This chronometer was thought to have been lost with HMS Erebus, but was found in 2009 by the Royal Observatory with the maker’s mark scratched off. Its presumed theft at the time saved it from being lost with the rest of the Franklin Expedition.

The main Franklin Expedition cabinet is just ahead...


Advisory: Due to its fragility, the Victory Point Record here is a copy, not the original.
There are seven bonafide relics of the Franklin Expedition in this cabinet, all on the right-hand side.
The Cape Riley Pipe. (link to Greenwich)
After the expedition had been missing for half a decade, the first traces were found at a place called Cape Riley. This pipe was one of those very first traces. It’s hard to see given how deep into the cabinet it is sitting, but there is actually still tobacco in the pipe bowl waiting to be lit – just as it was found along the shore by Capt. Ommanney’s search. A few days after this pipe was found, searchers would find graves across the bay from Cape Riley, at a place called Beechey Island.
In the center of this cabinet is an impressive double portrait of Kallihirua/Qalasirssuaq (link to Greenwich). He was an interpreter and guide from Greenland on Capt. Ommanney’s search ship – which means he was present at Cape Riley on the day this pipe was found.
In The Terror series: While the majority of the Franklin Expedition pipes that have been found in the Arctic are short clay pipes similar to this Cape Riley Pipe (seen in detail below, top left), Allegra Rosenberg notes that the pipes smoked by Franklin, Crozier, and Blanky in the series have a different appearance.

Dip circle. (link to Greenwich)
Bottom, center. A scientific instrument for measuring the earth’s magnetism – and shockingly useless to men on a desperate march for survival. Found by the McClintock search around the cairn at Victory Point (which contained the famous record).
In The Terror series: A very similar instrument sits in Capt. Crozier’s cabin on Terror. Though not quite the Victory Point dip circle, Allegra Rosenberg notes that it is likely the show’s reference to the iconic relic. It is seen clearest when Crozier offers Mr. Hickey a whiskey (episode 2, link to image). Another similar object is seen being packed into a box for a sledge journey (a minute into episode 7).
Pocket Chronometer P&F 980 “4 o’clock” (link to Greenwich)
Top, center. One of two pocket chronometers found in the boat with two headless skeletons, on King William Island, recovered by the McClintock search. This chronometer seems to have always been stopped at 4 o’clock, from the earliest sketches and photography till today. [At 4:01 to be exact. Crozier’s watch has changed; it is currently at 10:10.]
“E” pemmican tin. (link to Greenwich)
Bottom, left. A food tin found at the boat with two headless skeletons found on King William Island, recovered by the McClintock search. In the cabinet, look at the back of the tin box to see the large black “E” written on it. This “E” was presumed by searchers to have stood for “Erebus.”
Telescope piece. (link to Greenwich)
Top, right. Made of silver. Found by McClintock around the cairn at Victory Point (that contained the famous record).
In The Terror series: John Irving’s telescope is highlighted twice (episode 1 loaned to Tozer, episode 7 given to the Inuit). However all telescopes in the series appear to be of brass, while this piece is silver.
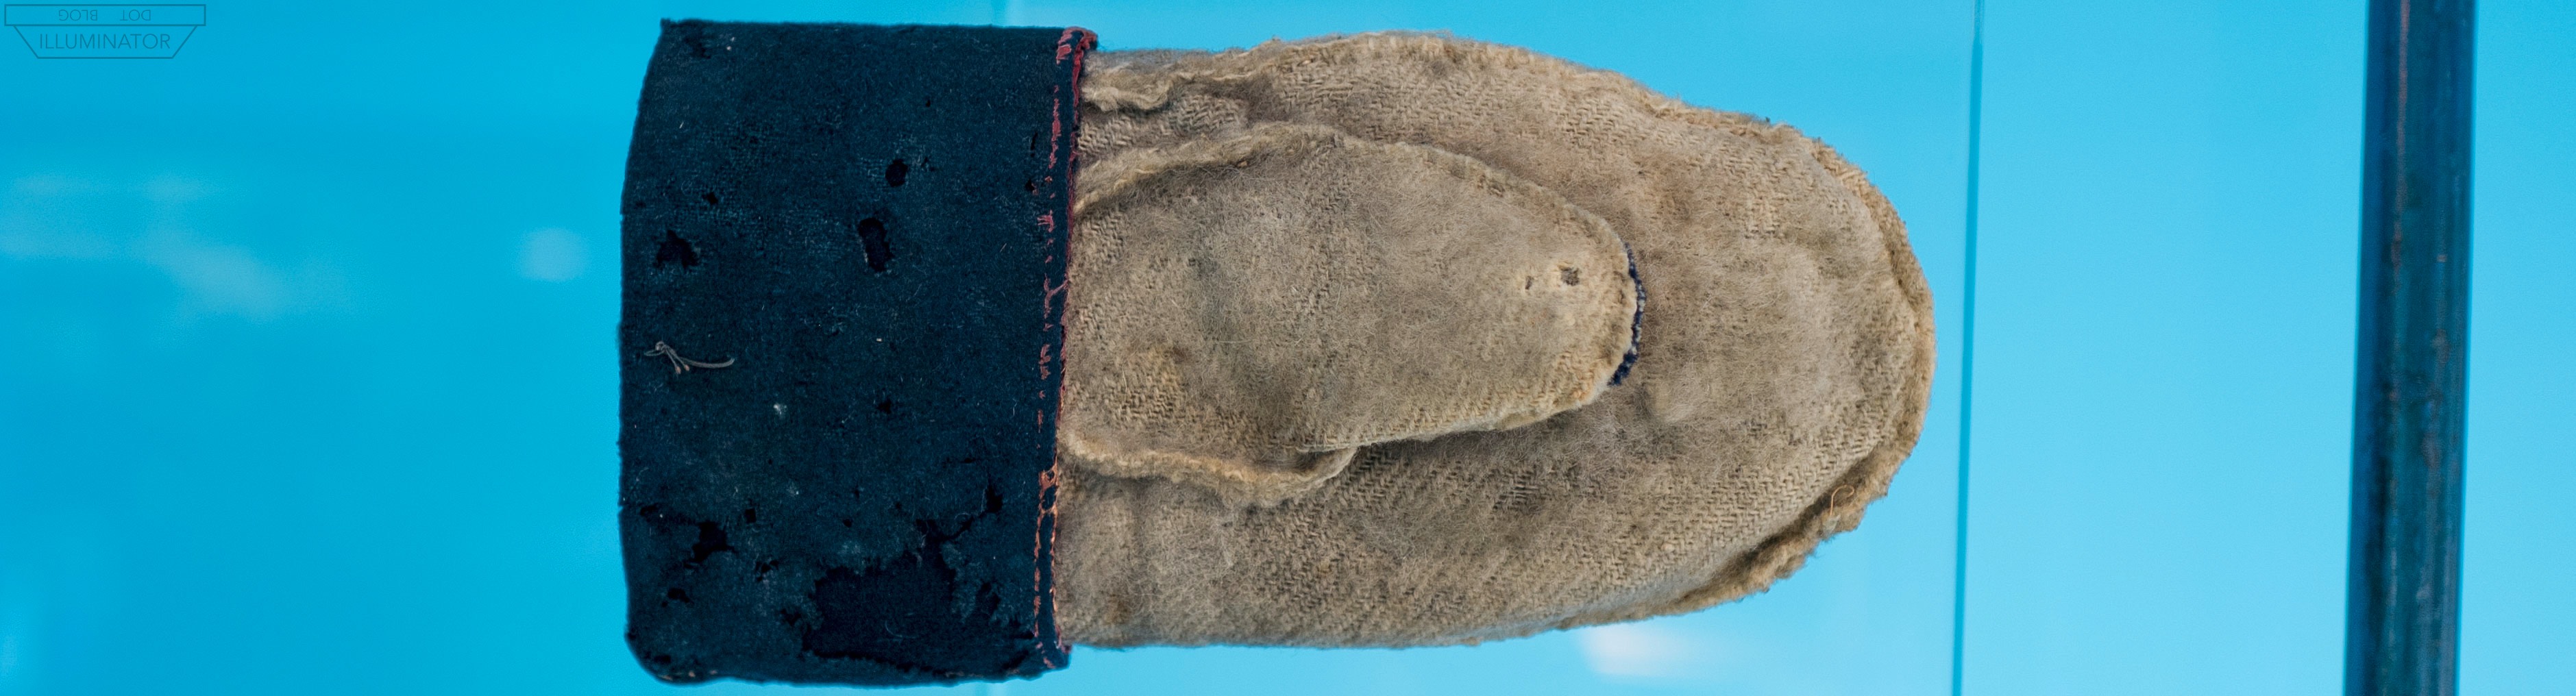
Starvation Cove seaboot. (link to Greenwich)
Bottom, right. A leather boot found at Starvation Cove during the Schwatka search, likely by Inuk Joe Ebierbing (husband of Tookoolito and part of the earlier Charles Francis Hall search).
In The Terror series: The monogrammed boots of James Fitzjames appear prominently in the story. But Allegra Rosenberg notes that this style of boot is best seen in examples on the ground towards the end of the series.

{ Sir John Franklin’s medal. }
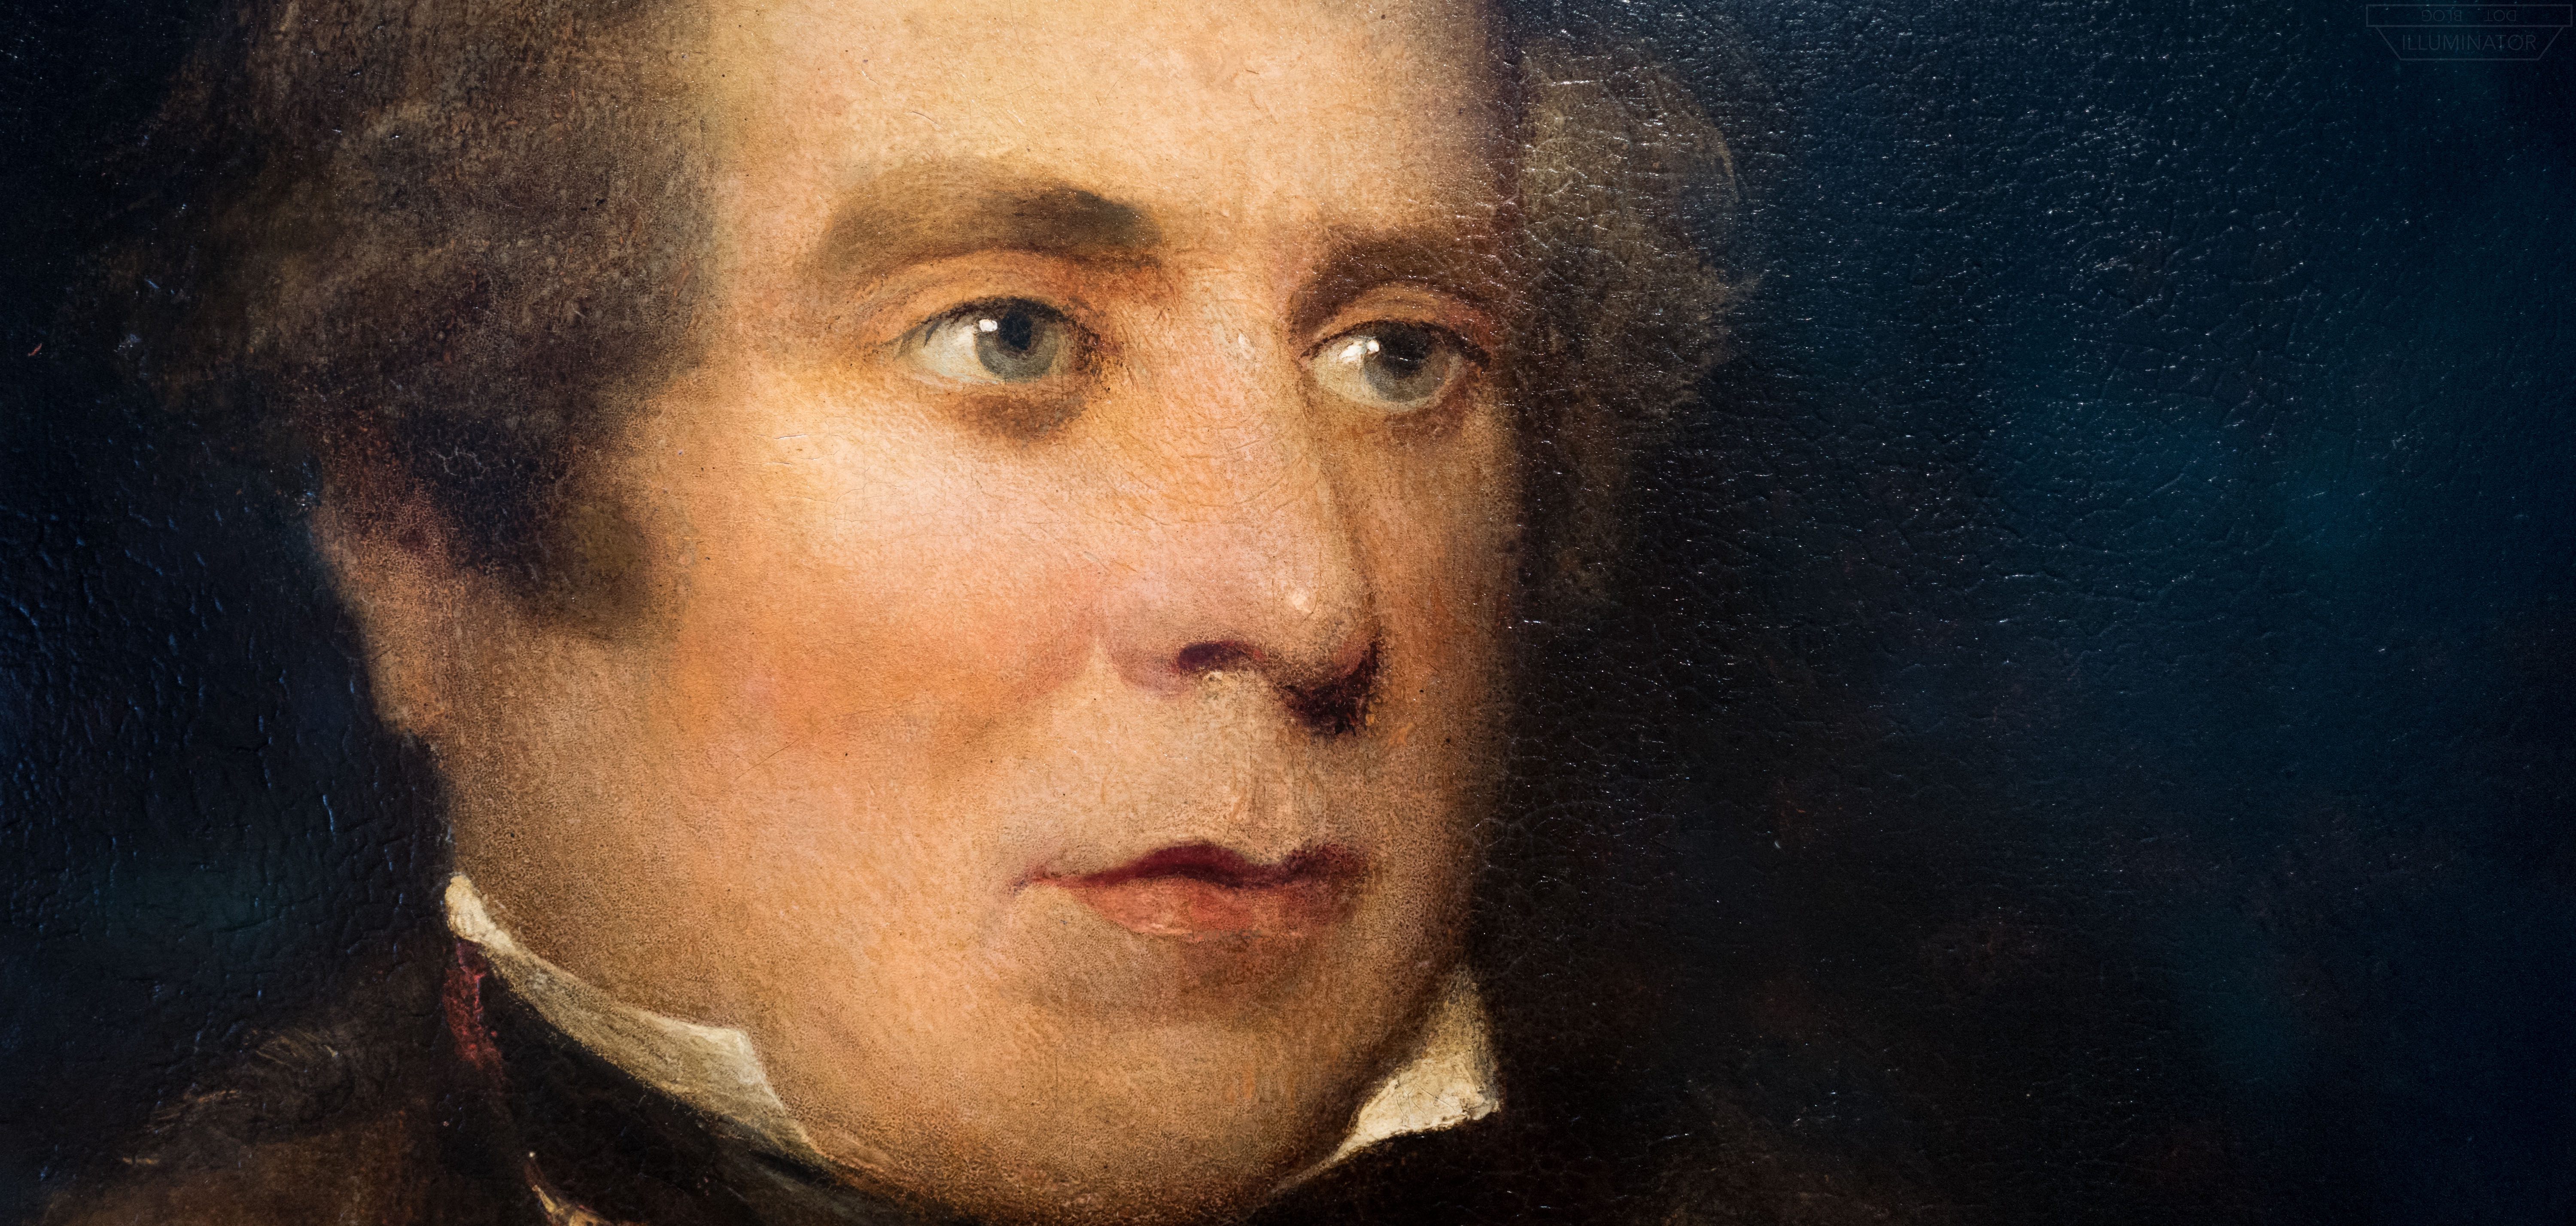
Sir John Franklin’s medal. (link to Greenwich)
This is the same medal seen hanging from Franklin’s neck in the photograph taken of him just prior to sailing. Recovered by the Inuit and then traded to John Rae in 1854, the very personal quality of the badge was a sign that Franklin had not survived. The Inuit who gave it to Rae would direct future searches in a new direction: the area around King William Island.

{ Sir John Franklin, 1845. Just prior to sailing from London. }
{ © National Maritime Museum, Greenwich, London }
Richards’ pocket quintant. (link to Greenwich)
This instrument (detail below, top right) is not a relic of the Franklin Expedition. Rather it was used to search for them, by Commander Richards on the Belcher search. The pocket quintant may well be in Richard’s pocket in the sketch below (Richards is on the far right), part of the newspaper coverage of that final Royal Navy attempt to find Franklin.
In The Terror series: Crozier is carrying a sextant as he speaks to Mr. Hickey in episode 2 (link). Greenwich museum once held an actual Franklin Expedition sextant that the McClintock search recovered at Victory Point, however it was stolen from the museum in 1982. [If the current owner is reading this, now during the shipwreck excavations would be the perfect moment to return it to the museum.]
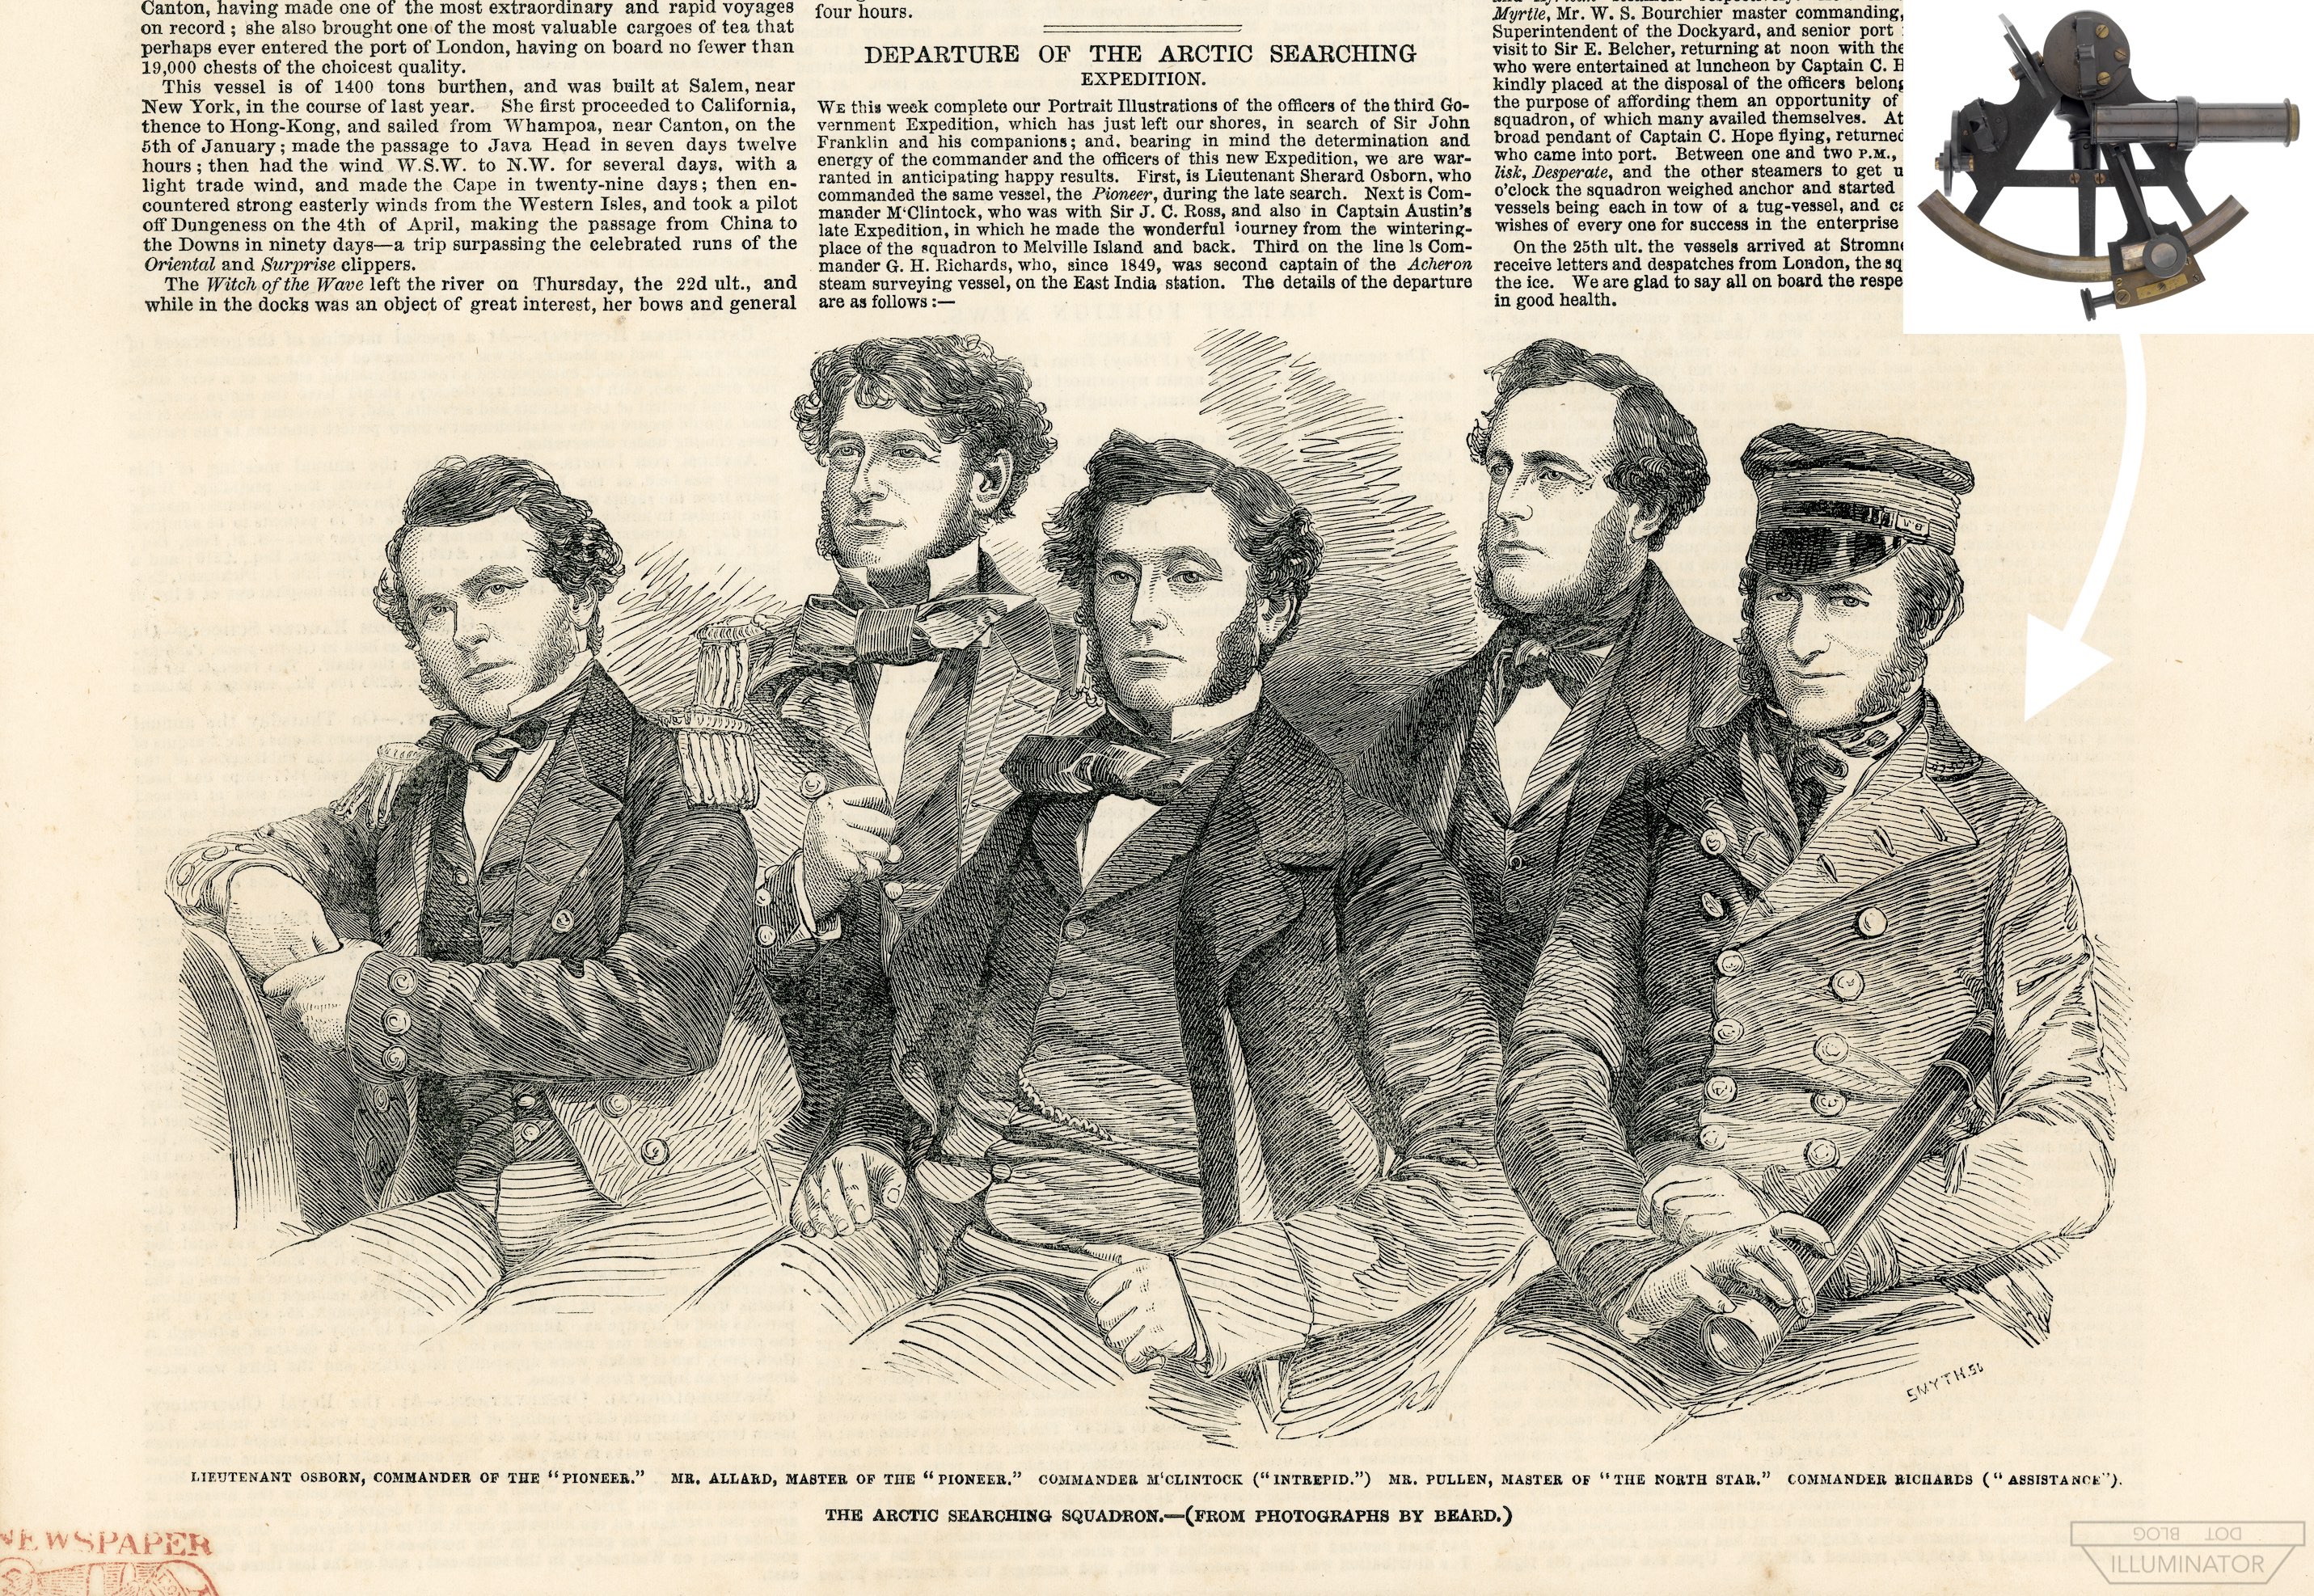
In the middle of this newspaper sketch sits McClintock. It would be his own search – half a decade after this sketch, and sent by Jane Franklin not the Royal Navy – that would recover the Victory Point Record, along with four of the six Franklin Expedition relics seen in this same cabinet.
McClintock’s Arctic smock. (link to Greenwich)
In The Terror series: Similar beige canvas smocks and trousers are seen throughout the series for cold-weather sledging.
[NOTE: The handsome portrait of a man on the info card next to the smock/trousers is not Leopold McClintock, but another searcher named John Rae.]

The Fox’s bell. (link to Greenwich)
Above McClintock’s smock is the bell from the Fox, his search ship. At the floor level is a model of the same Fox in the ice (link to Greenwich).


HMS Resolute’s Polar Bear figurehead. (link to Greenwich)
The polar bear figurehead of HMS Resolute (the same Franklin search ship discussed in the previous cabinet). The figurehead has something pinned to the nose (not visible here), but I can not read it. Oddly, one can see holes on the snout where this polar bear once had whiskers.
Additional notes and links:
Behind this cabinet is a model of a Franklin search balloon, of which Greenwich still has a (fragile) original of. These were designed to slowly release messages to potential survivors as they floated away over the horizon. A copy of one of the surviving balloon messages is in the cabinet, next to an actual search ‘button’ designed with a similar message for survivors that might encounter it. (link to Greenwich)
Box Chronometer Arnold 323 (signed out for the Belcher search). (link to Greenwich)
Model of Erebus. (link to Greenwich)
Gold pocket chronometer associated with Robert McClure. (link to Greenwich)
Bust of Sir John. (link to Greenwich)
Rock samples from Franklin searches. (link to Greenwich)
Boomerang. (link to Greenwich)

‘They forged the last link(s) with their lives’ painting. (link to Greenwich)
The painting on the left. Detail of the central figure seen above.
HMS Erebus in the Ice, 1846 painting. (link to Greenwich)
The painting on the right.


Moving to your right, there is a fine painting of John Ross, and one of Captain Parry later in life.
The painting on the right.
Moving to your right, there is a fine painting of John Ross, and one of Captain Parry later in life.
John Ross portrait. (link to Greenwich)
John Ross was a Northwest Passage veteran, and one of the first to raise the alarm that something had gone wrong. He told Franklin before departure that he’d personally search for him if they didn’t return, a promise he fulfilled in his 70s. Old John Ross was present on the day the Beechey graves were discovered; remnants of a ship he left at Beechey Island for Franklin survivors can still be seen on the ground today. [His nephew, the younger James Clark Ross discussed earlier, captained Erebus on the Antarctic expedition.]
William Edward Parry portrait. (link to Greenwich)
The Royal Navy’s most successful Northwest Passage explorer. The violin from his Arctic expeditions is in the next cabinet.


Parry’s violin. (link to Greenwich)
Right-hand cabinet. Captain Parry – whose portrait we saw to the right – wrote the book on overwintering a Royal Navy ship in polar regions. Entertainment such as music, theater, and masquerades through the polar night was part of how Parry got his men through. Capt. Parry and his violin concerts are the direct ancestor to scenes such as the New Years in Antarctica watercolor we saw earlier, and James Fitzjames’ Carnivale scene in episode 6 of The Terror series.
James Clark Ross painting. (link to Greenwich)
Captain of the Erebus on the Antarctic expedition, and the nephew of Old John Ross (just seen in the painting to your right). Prior to Antarctica with Crozier, James Clark Ross had discovered the North Magnetic Pole on an expedition with his uncle John Ross. The younger Ross would lead the first major search for Franklin in 1848–49, commanding HMS Enterprise and Investigator.
Left-hand cabinet: (below)

Franklin’s moccasins and mitten are here, but from earlier land expeditions to the Arctic (Greenwich links: mitten, moccasins). [Note: The mitten and moccasins are currently out for conservation reasons.]
Do check out the pole before moving on: what looks like a cabinet frame support is actually the jackstaff (flagstaff) used by James Clark Ross in 1831 to mark the discovery of the North Magnetic Pole (link to Greenwich). Next to it is a sword of his. (As of this writing, Sword #WPN1300 is not currently online.)


Goldner tin from Beechey Island. (link to Greenwich)
A Goldner meat can, often the prime suspect of the men’s demise. These red cans have been variously blamed for causing starvation because they were all rotten, or secretly causing lead poisoning, or causing scurvy (canned meat doesn’t protect against scurvy). While only the last conclusion is universally agreed upon, all of these theories have made the red cans into a symbol for what went wrong.
In The Terror series: These red cans are seen throughout the show, including a storyline where Harry Goodsir shares meat from one with Jacko the monkey to test for poisoning. Allegra Rosenberg notes that even a Goldner-branded supply cart can be momentarily spotted unloading near the ships in episode 3 (link).
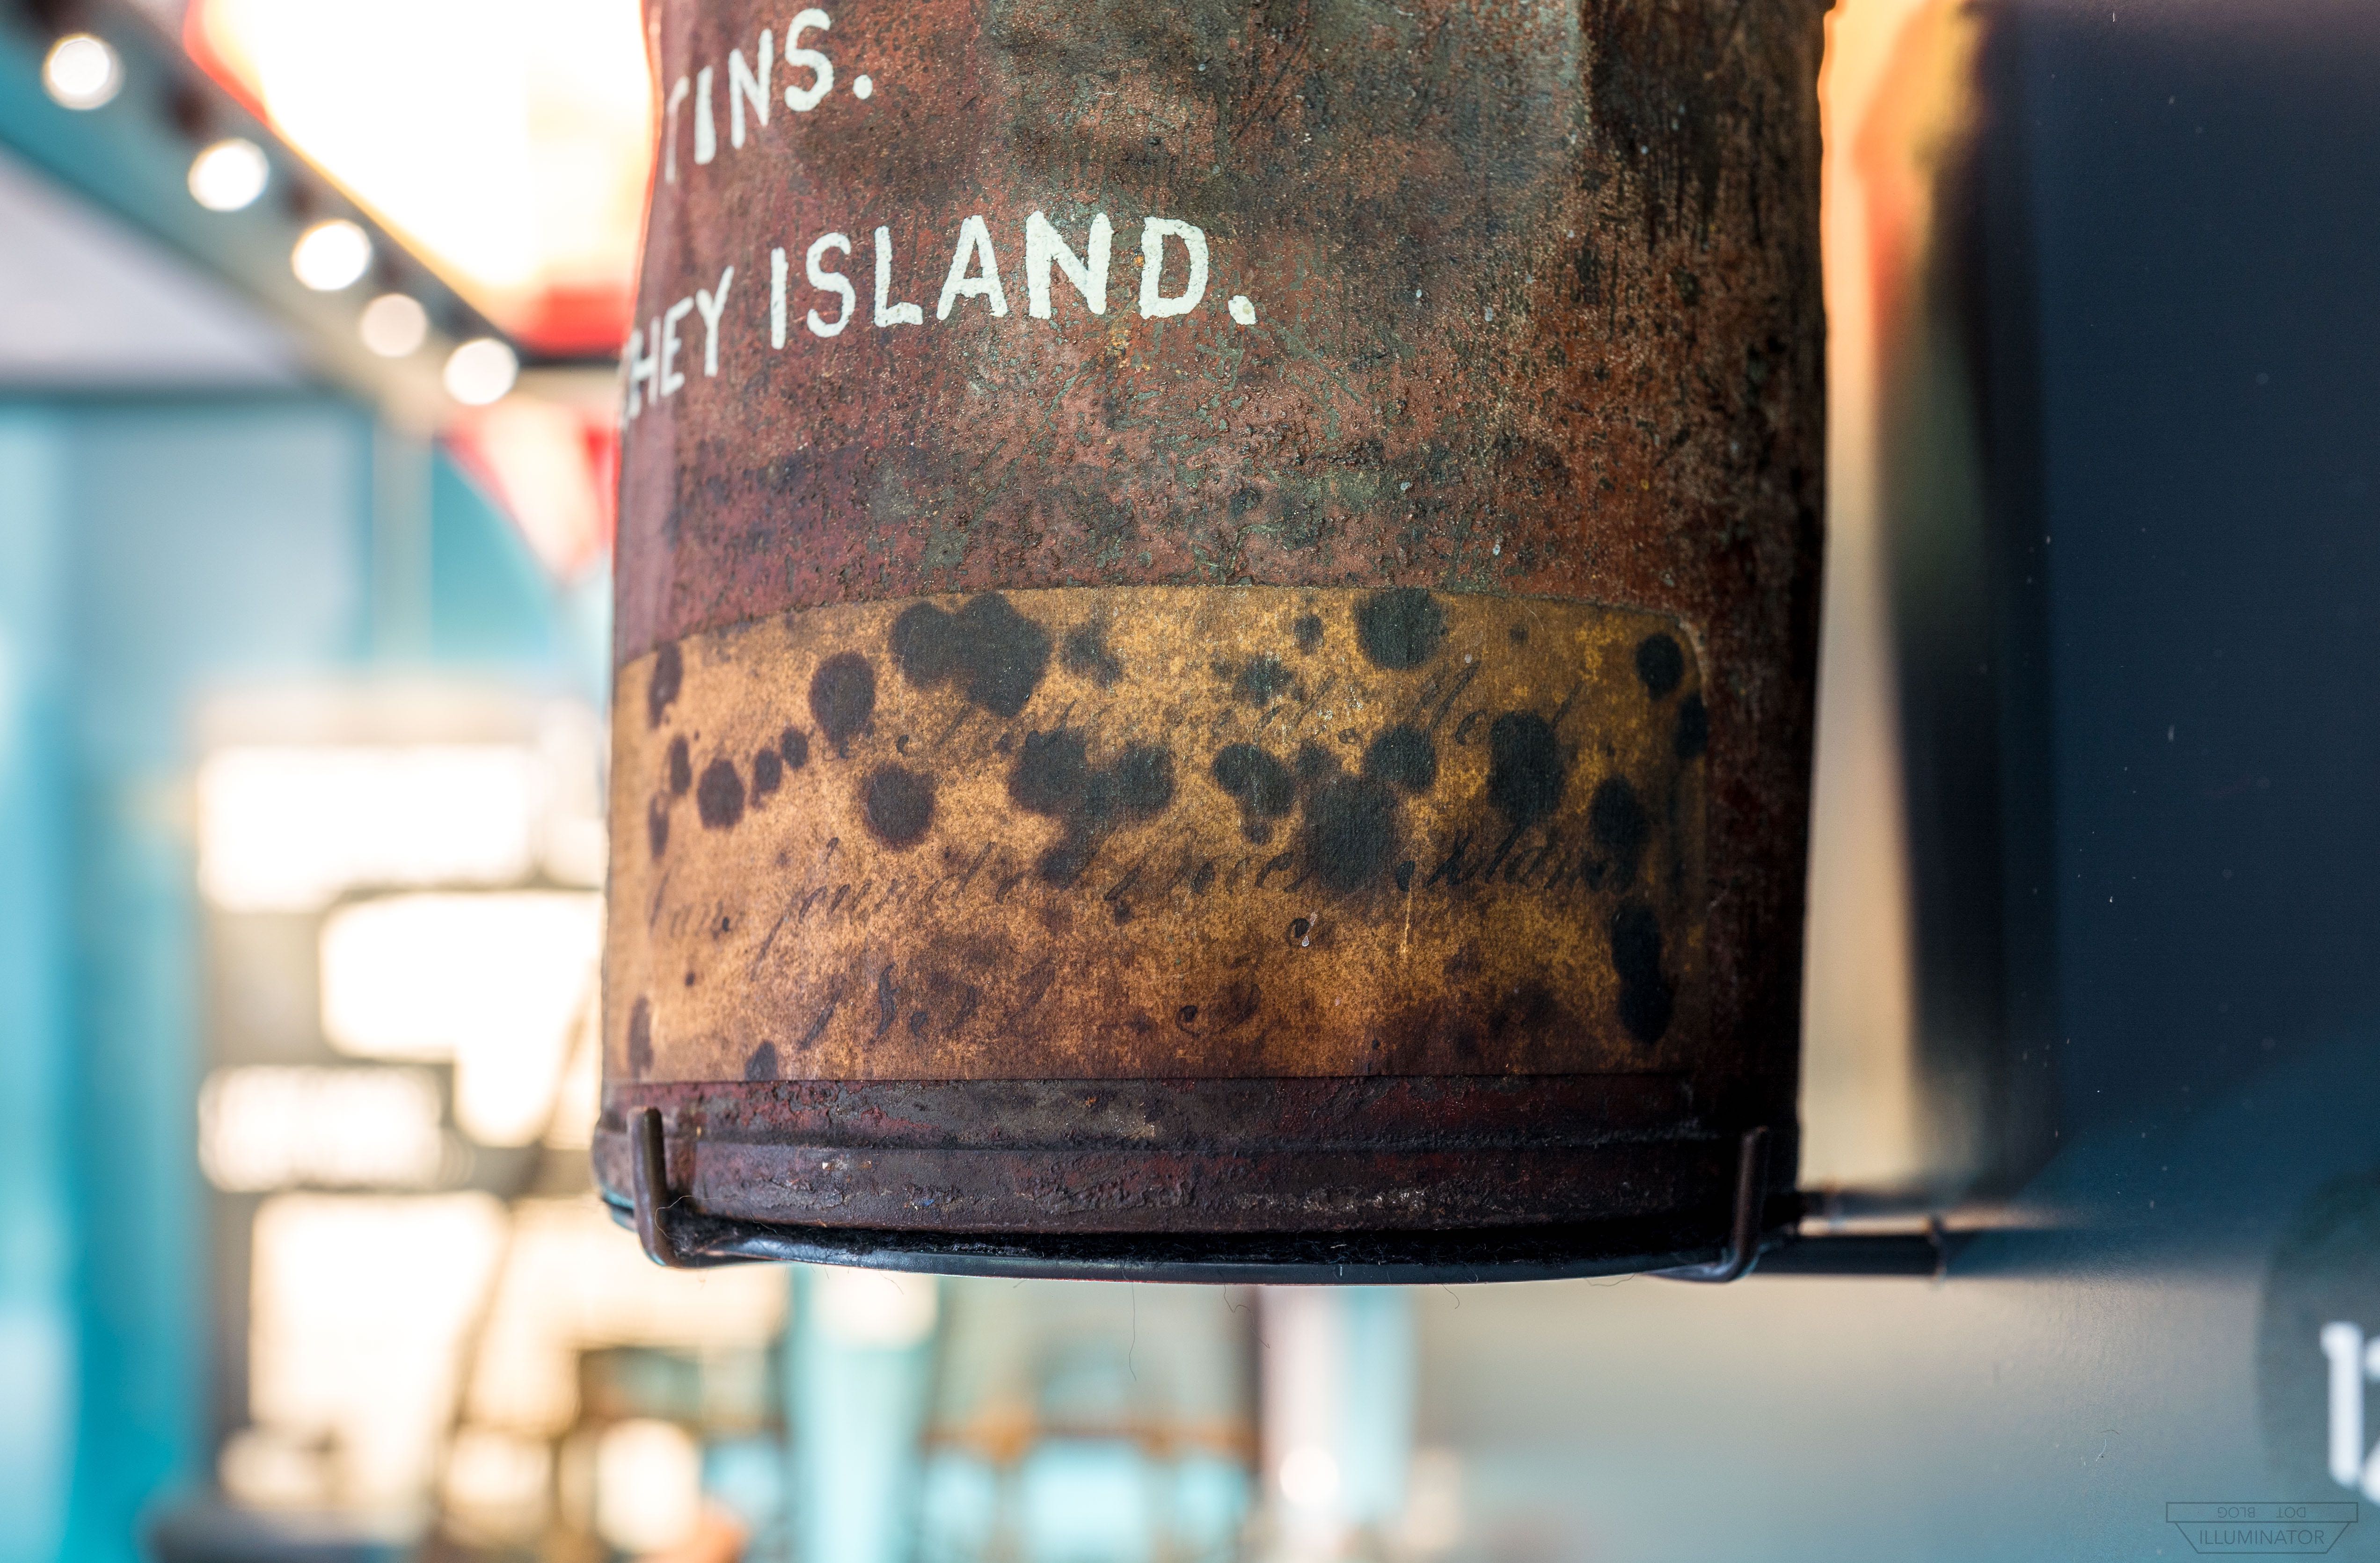
The now barely-readable note was written after the Goldner can was recovered. “1852-3” is the last line, helping identify this can as being brought back from Beechey Island by Capt. Inglefield (two years after the Beechey camp was first discovered).
Preserved meat sample. (link to Greenwich)
This visible meat sample, believed to be from the Franklin Expedition, was taken from an intact can and placed in this display in 1926. It looks through the glass like fresh prosciutto.
Ship’s biscuit. (link to Greenwich)
Greenwich’s website identifies this cookie as coming from one of Old John Ross’ expeditions. Greenwich adds that, therefore, it may originate from Capt. Parry (he of the violin behind you) and his wrecked ship HMS Fury, as John Ross raided the wrecked Fury’s abandoned stores when he got the Victory stuck in Prince Regent Inlet (1829-33). The Franklin Expedition would have survived on ship’s biscuit similar to this one.
In The Terror series, Blanky mentions Ross raiding the Fury wreck’s stores to Captain Fitzjames, in a private conversation on Erebus (episode 6): “We had one day’s provisions left. One. Were it not for the cache of stores left there from the wreck of the Fury, we’d still be on that beach, bleaching in the wind.”
Additional notes:
There’s a little vintage Tripe de Roche from George Back under the hatchet, a lichen that Franklin’s men – George Back among them – tried to survive on during a previous Arctic land expedition. [In The Terror series, this disaster is referenced, “with all due honor,” by Crozier to Franklin (episode 1). “For god’s sake, Francis”]
The bottle in the cabinet is not the bottle found at Beechey/Cape Riley; it is not Franklin-related. Neither is the tray of old pemmican, which is of a later date.

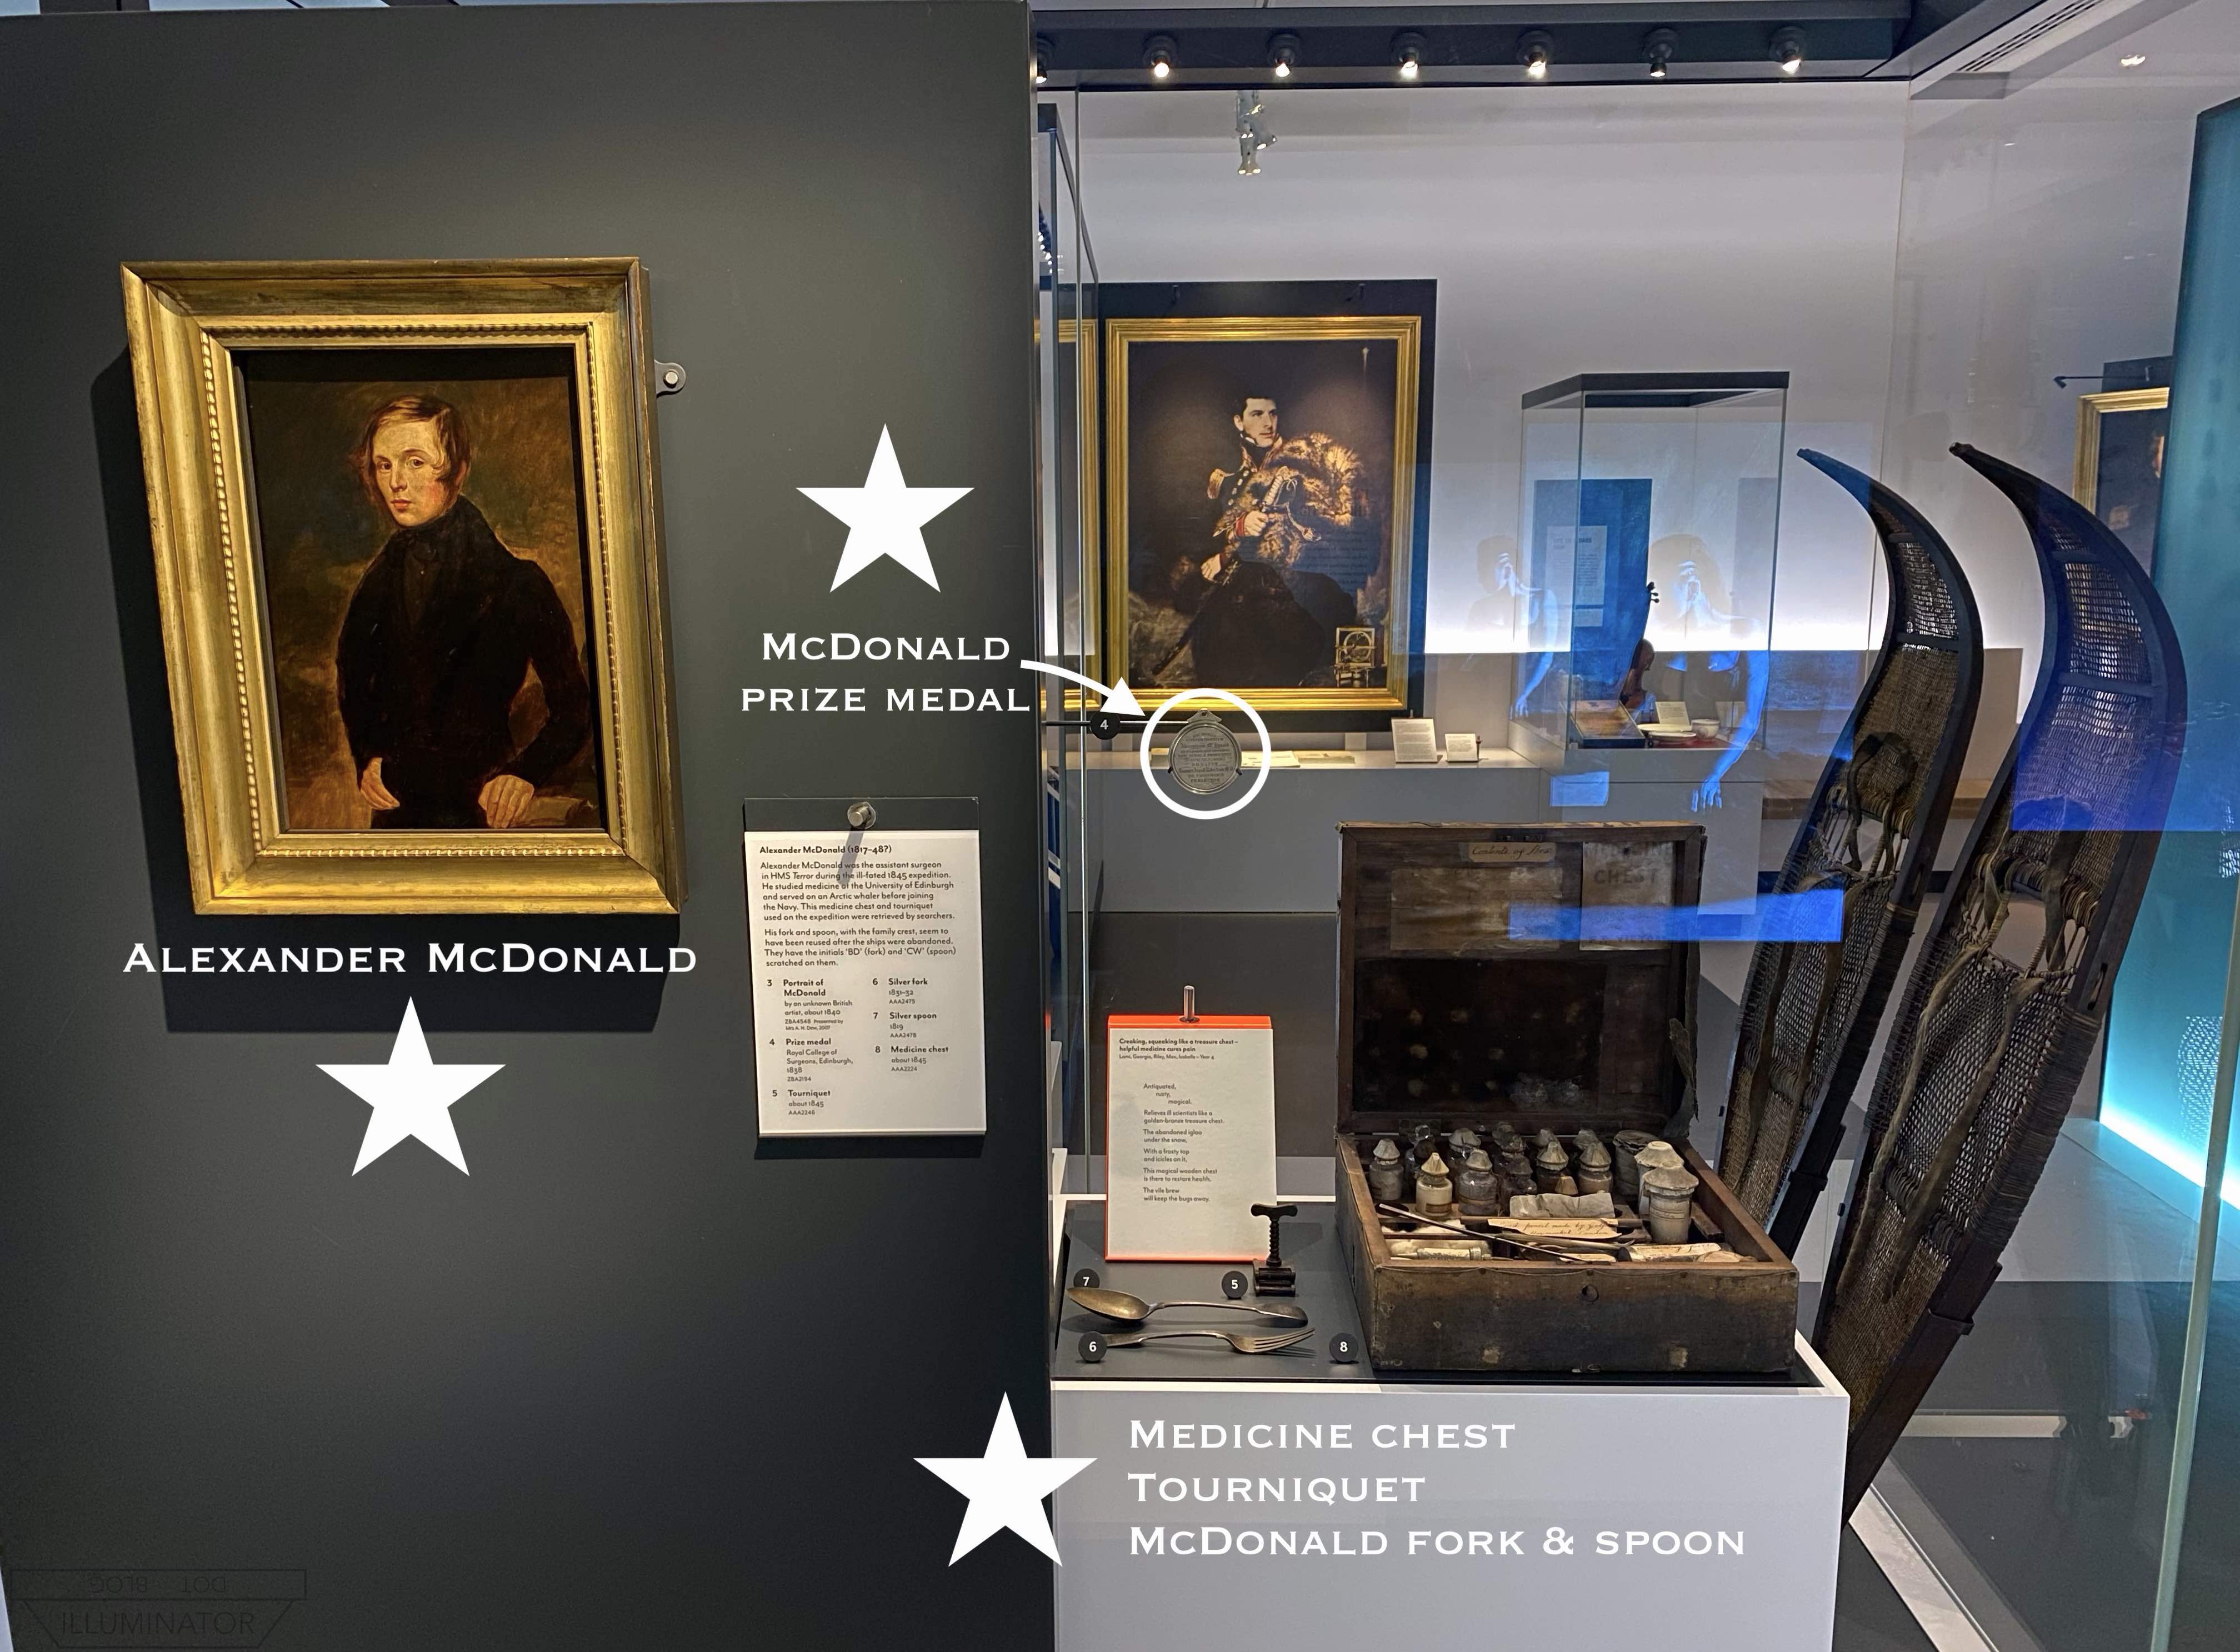
This little section is the story of one lost man, Alexander McDonald, 27 years old when he disappeared. Alexander was Assistant Surgeon on Terror, the same position as Harry Goodsir on Erebus; both were Scots trained in Edinburgh and just two years apart in age.

Portrait of Alexander McDonald. (link to Greenwich)
Because he was on Terror not Erebus, there was no photograph taken of Alexander at the ships’ departure. However, we can see what he looked like from this striking portrait, just donated in 2008.


Silver fork. (link to Greenwich)
In the cabinet, we see two medical relics that Alexander may have used as Assistant Surgeon: a medicine chest and a tourniquet. The medicine chest was found around the cairn at Victory Point (that contained the famous record) by the McClintock search; the tourniquet was recovered later by the Schwatka search.
The fork and spoon were Alexander’s, decoratively engraved with his initials: A Mc D. The pattern can just be discerned here on the spoon’s handle.
In The Terror series: Allegra Rosenberg notes that effectively all of the relics pictured above appear in the television series. This tourniquet device is seen being used by Alexander McDonald on Thomas Blanky, when Blanky says he’s “celebrating an engagement” at the end of episode 5 (link to image). The medicine chest appears with Goodsir, albeit of a larger design, in episode 10 (link). Alexander McDonald’s knife and fork are seen being used by him in the dinner scene in episode 1 (link).

Alexander McDonald’s prize medal. (link to Greenwich)
Hanging above the other relics is a prize medal that Alexander won for “superior attainments at a medical examination in Edinburgh.” The Inuit had recovered this medal and later gave it to McClintock at the start of his search.


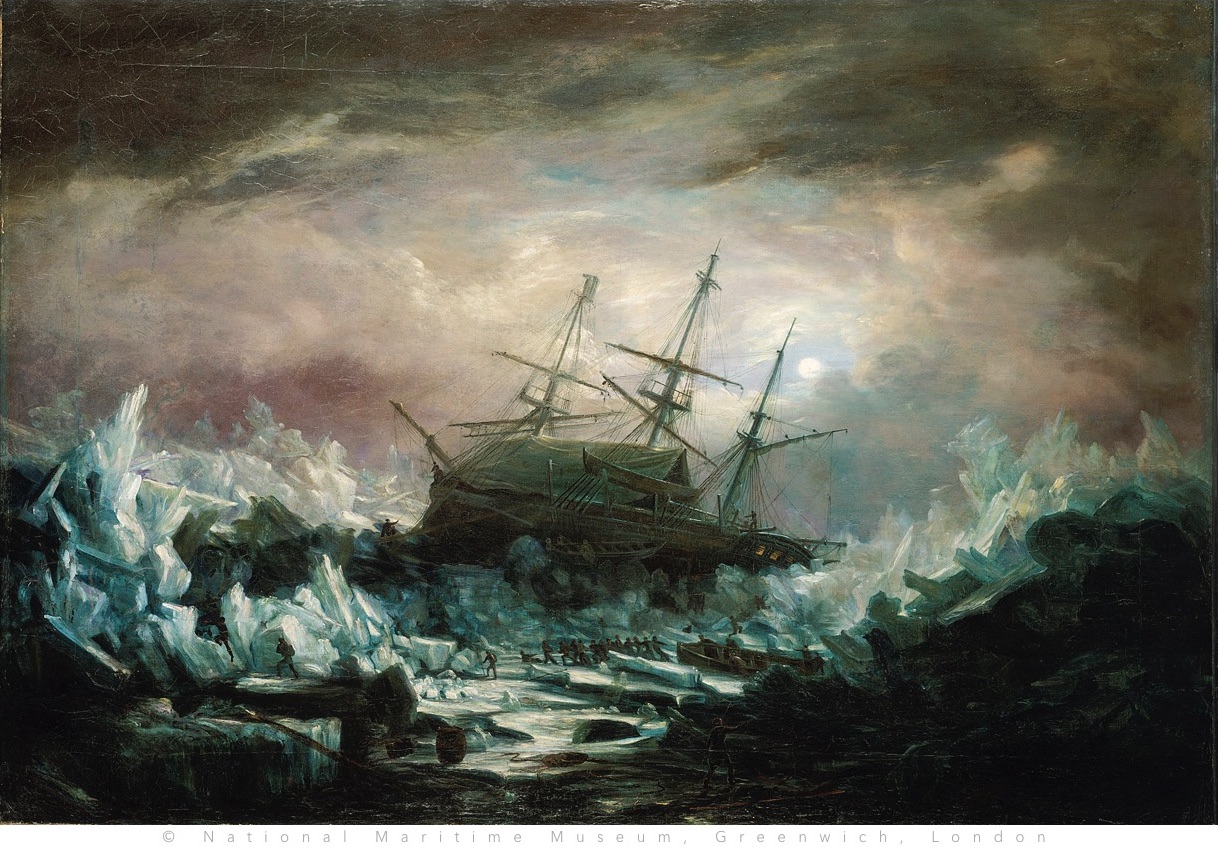
Perilous position of HMS Terror painting. (link to Greenwich)
As you proceed, the painting on your left depicts HMS Terror during the disastrous 1836-37 George Back expedition.
In The Terror series, Thomas Blanky references this same Northwest Passage attempt by Back just before he and Crozier leave Terror by ascending a ladder (episode 7): “In ’37 when George Back wrecked it, tugged it home across the Atlantic, she was barely afloat. No one could believe she kept herself up. She may well triumph.”
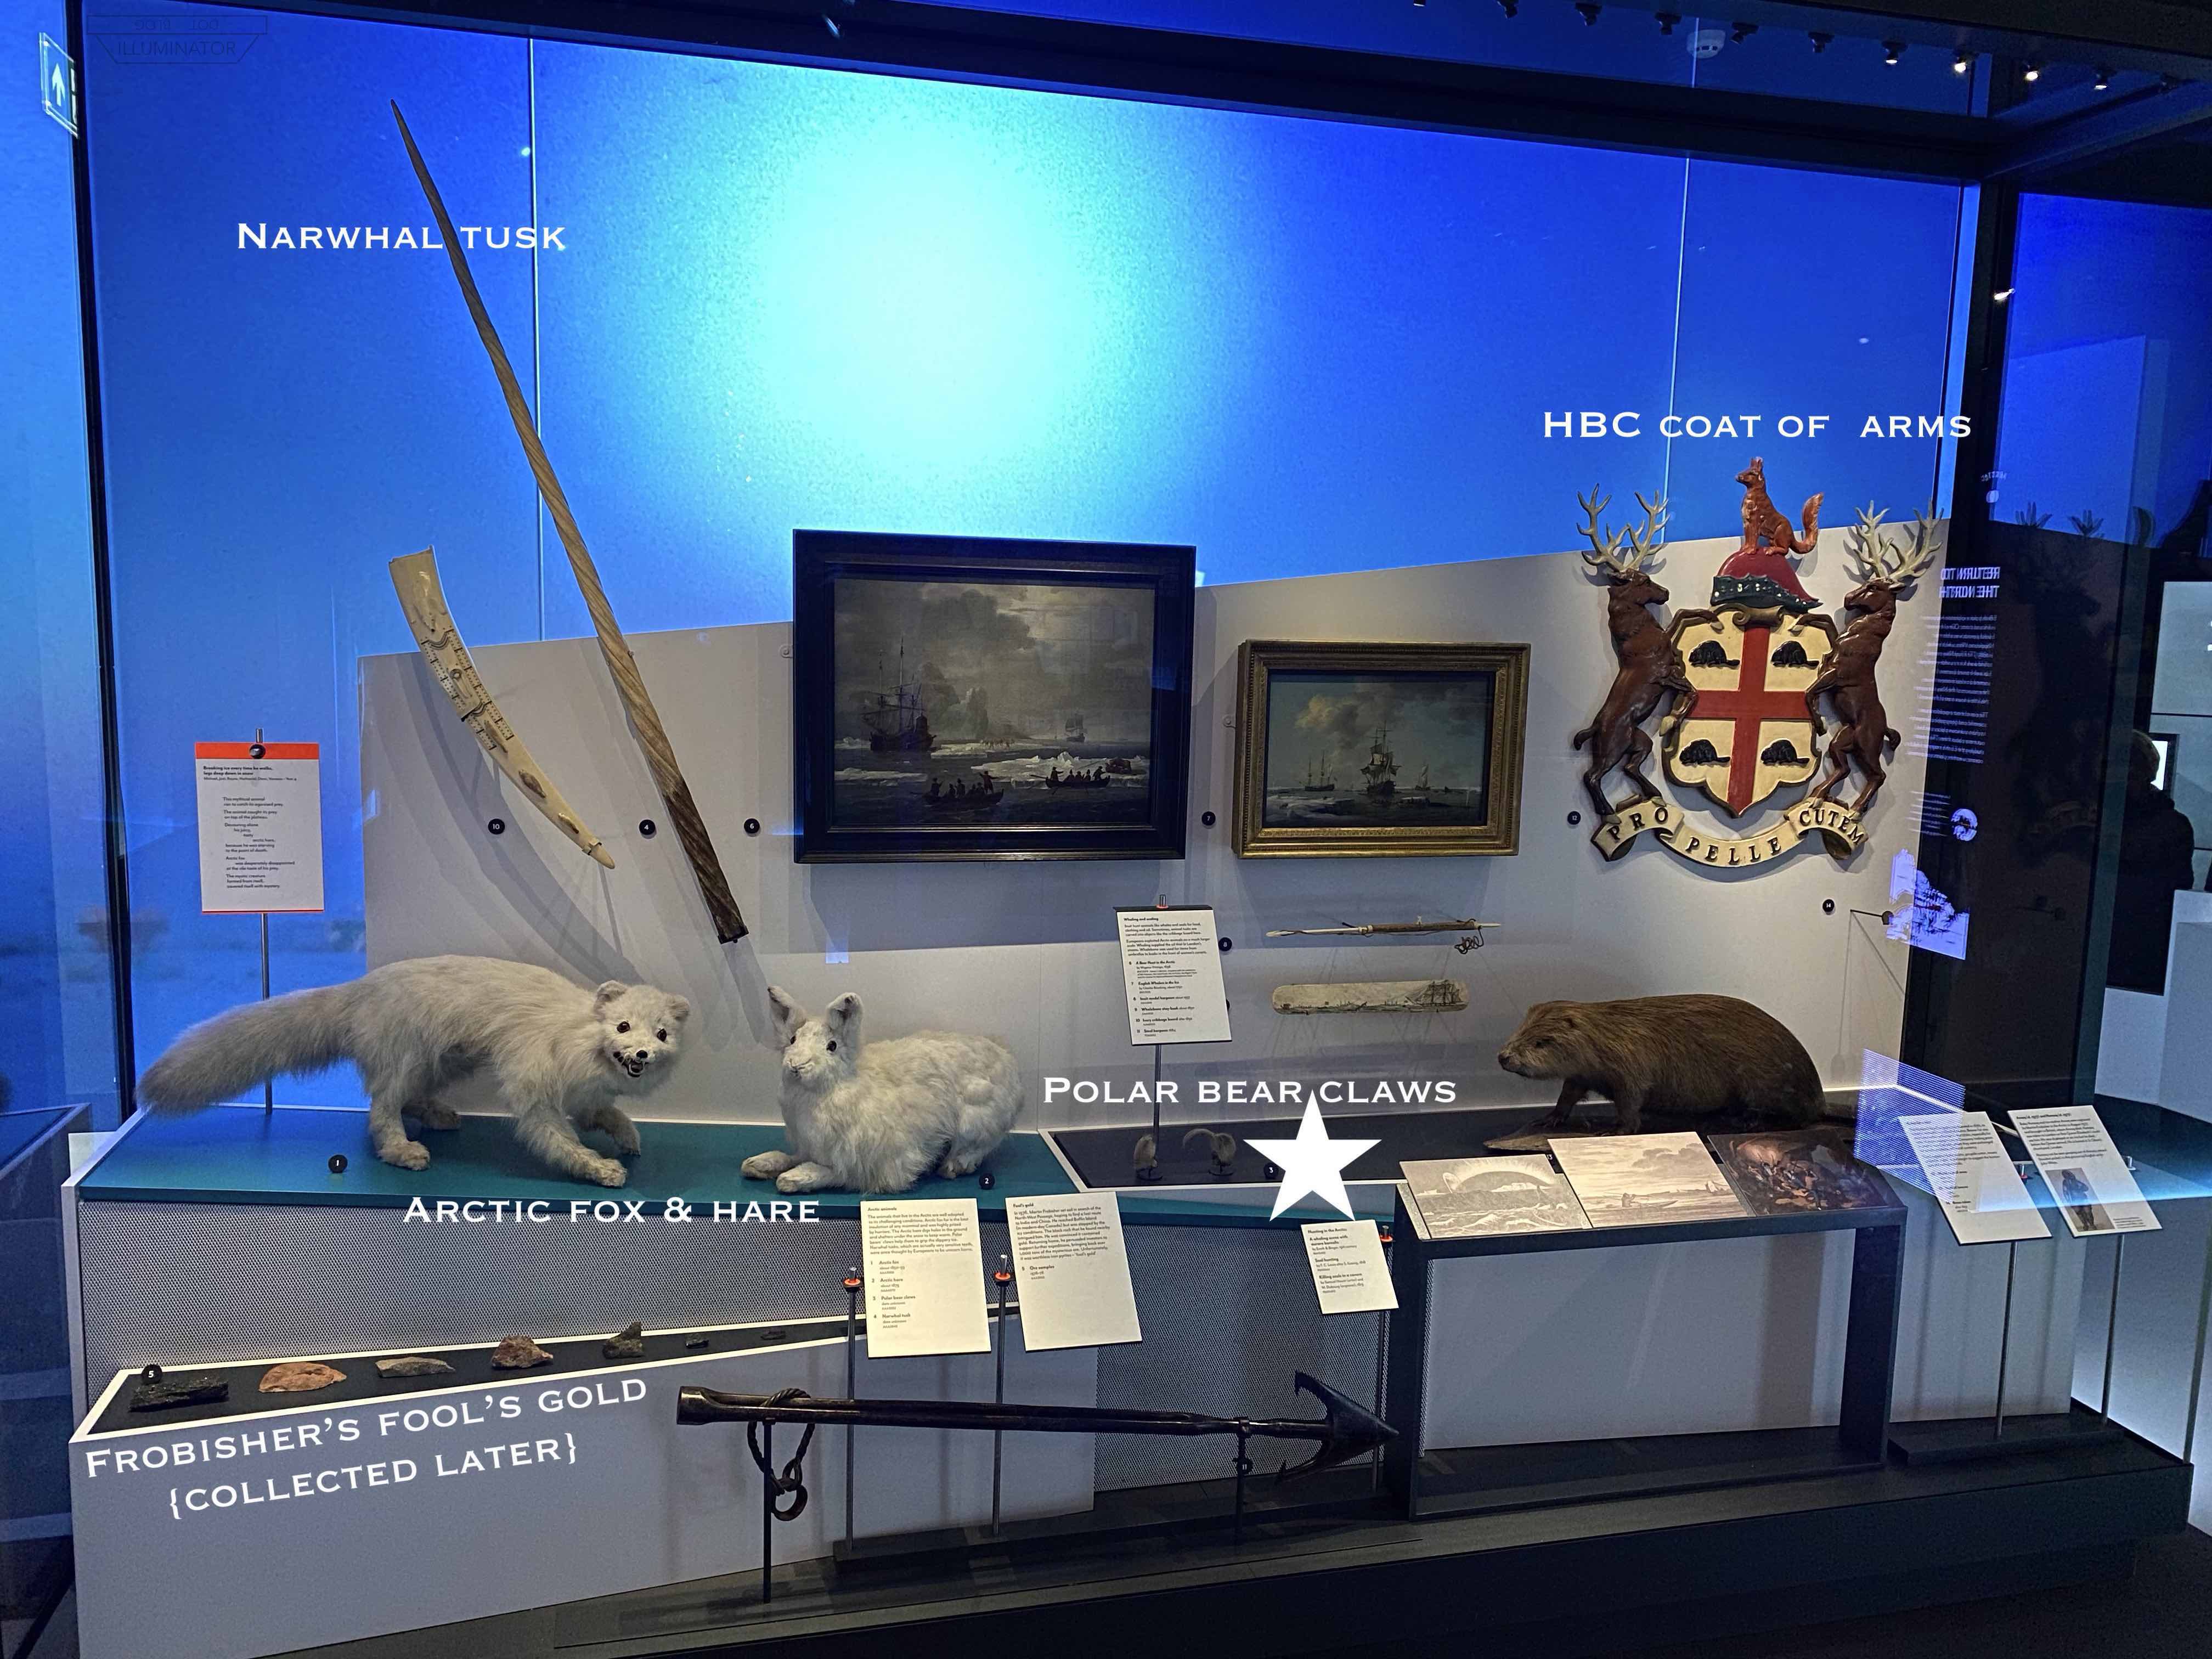
Polar bear claws. (link to Greenwich)
When first put on display in Polar Worlds, these two polar bear claws were still of unknown origin. Since then, they have been identified by Greenwich’s Polar Relics Curator, Jeremy Michell, as having returned with Captain Ommanney from the 1850-51 Franklin search (the search that located the graves at Beechey Island, and the Cape Riley Pipe seen a few cabinets earlier).
In The Terror series: These claws are as close as Polar Worlds gets to the Tuunbaq.


A collection of Franklin Expedition relics that were fashioned into new items by the Inuit.
The following four were recovered by McClintock’s search:
Arrow, iron head. (link to Greenwich)
Arrow, copper head. (link to Greenwich)
Bow. (link to Greenwich)
Snow knife. (link to Greenwich)
In The Terror series: While the series ends before the ships are harvested for new Inuit creations, we do see examples of most of these in the series. In episode 3, we see Silna using a snow knife to outline the floor of her igloo; her snow knife looks to be made entirely of bone. Later in her igloo, we see she has a spear, bow, and arrows along the wall. Five Inuit carvings are also seen in this cabinet; examples of Inuit sculpted figures are seen throughout The Terror series.

Toy Sledge. (link to Greenwich)
Inside model of Umiaq. This was the final Franklin Expedition relic picked up by McClintock, just before leaving King William Island. He found it at an abandoned igloo village strewn with wood shavings, an abundance which suggests Erebus wreck salvage.
Note: the relic is inside the larger Umiaq boat model, but it can be discerned by looking between the oars on top.
For further reading, see The Missing Toy Sledge (link).
Ulu made from a Goldner can. (link to Greenwich)
The letters “-LDNER” can still be seen on this Inuit tool, the last letters of the word “Goldner” stamped on a tin. Stephan Goldner supplied canned food to the Franklin expedition. He has been portrayed as the villain in the story, either for supplying cheap bad meat, or for sloppy soldering work that caused a lead-induced ‘Lord-of-the-Flies’-style breakdown. Both conclusions are heavily debated.
Peter Carney (the author of Erebus & Terror Files) identified this to me as his favorite object in the exhibition, as it contains a bit of every group’s story: the Franklin expedition who carried it to eat from, a makers mark from the Victorian society that sent them, and the Inuit who refashioned it into a practical knife for Arctic survival.
In The Terror series: An ulu is seen being used to cut meat when John Irving is given food by the Inuit (episode 7). Silna is seen sharpening her ulu in episode 3, and later uses it to help Crozier with his hand (episode 10).
File used as a sledge runner, recovered by the Hall search. (link to Greenwich)


Before exiting Polar Worlds, there’s this brief informational video given by Sammy Kogvik himself, the man who first suggested where to find HMS Terror in 2016. One tip that has stuck in my head from this video: if you overexert yourself in extreme cold, the sweat evaporating off your body can dangerously chill you.
The End.
– LZ, March 17, 2021.
* * *
Appendix 1: The relics in Atlantic Worlds, and elsewhere.
For completists, there are two more Franklin Expedition relics elsewhere in Greenwich’s museum.

This cabinet in Atlantic Worlds – one floor down and across the museum from Polar Worlds – holds some Arctic objects, including artifacts collected by George Back and two relics recovered by the Charles Francis Hall search.

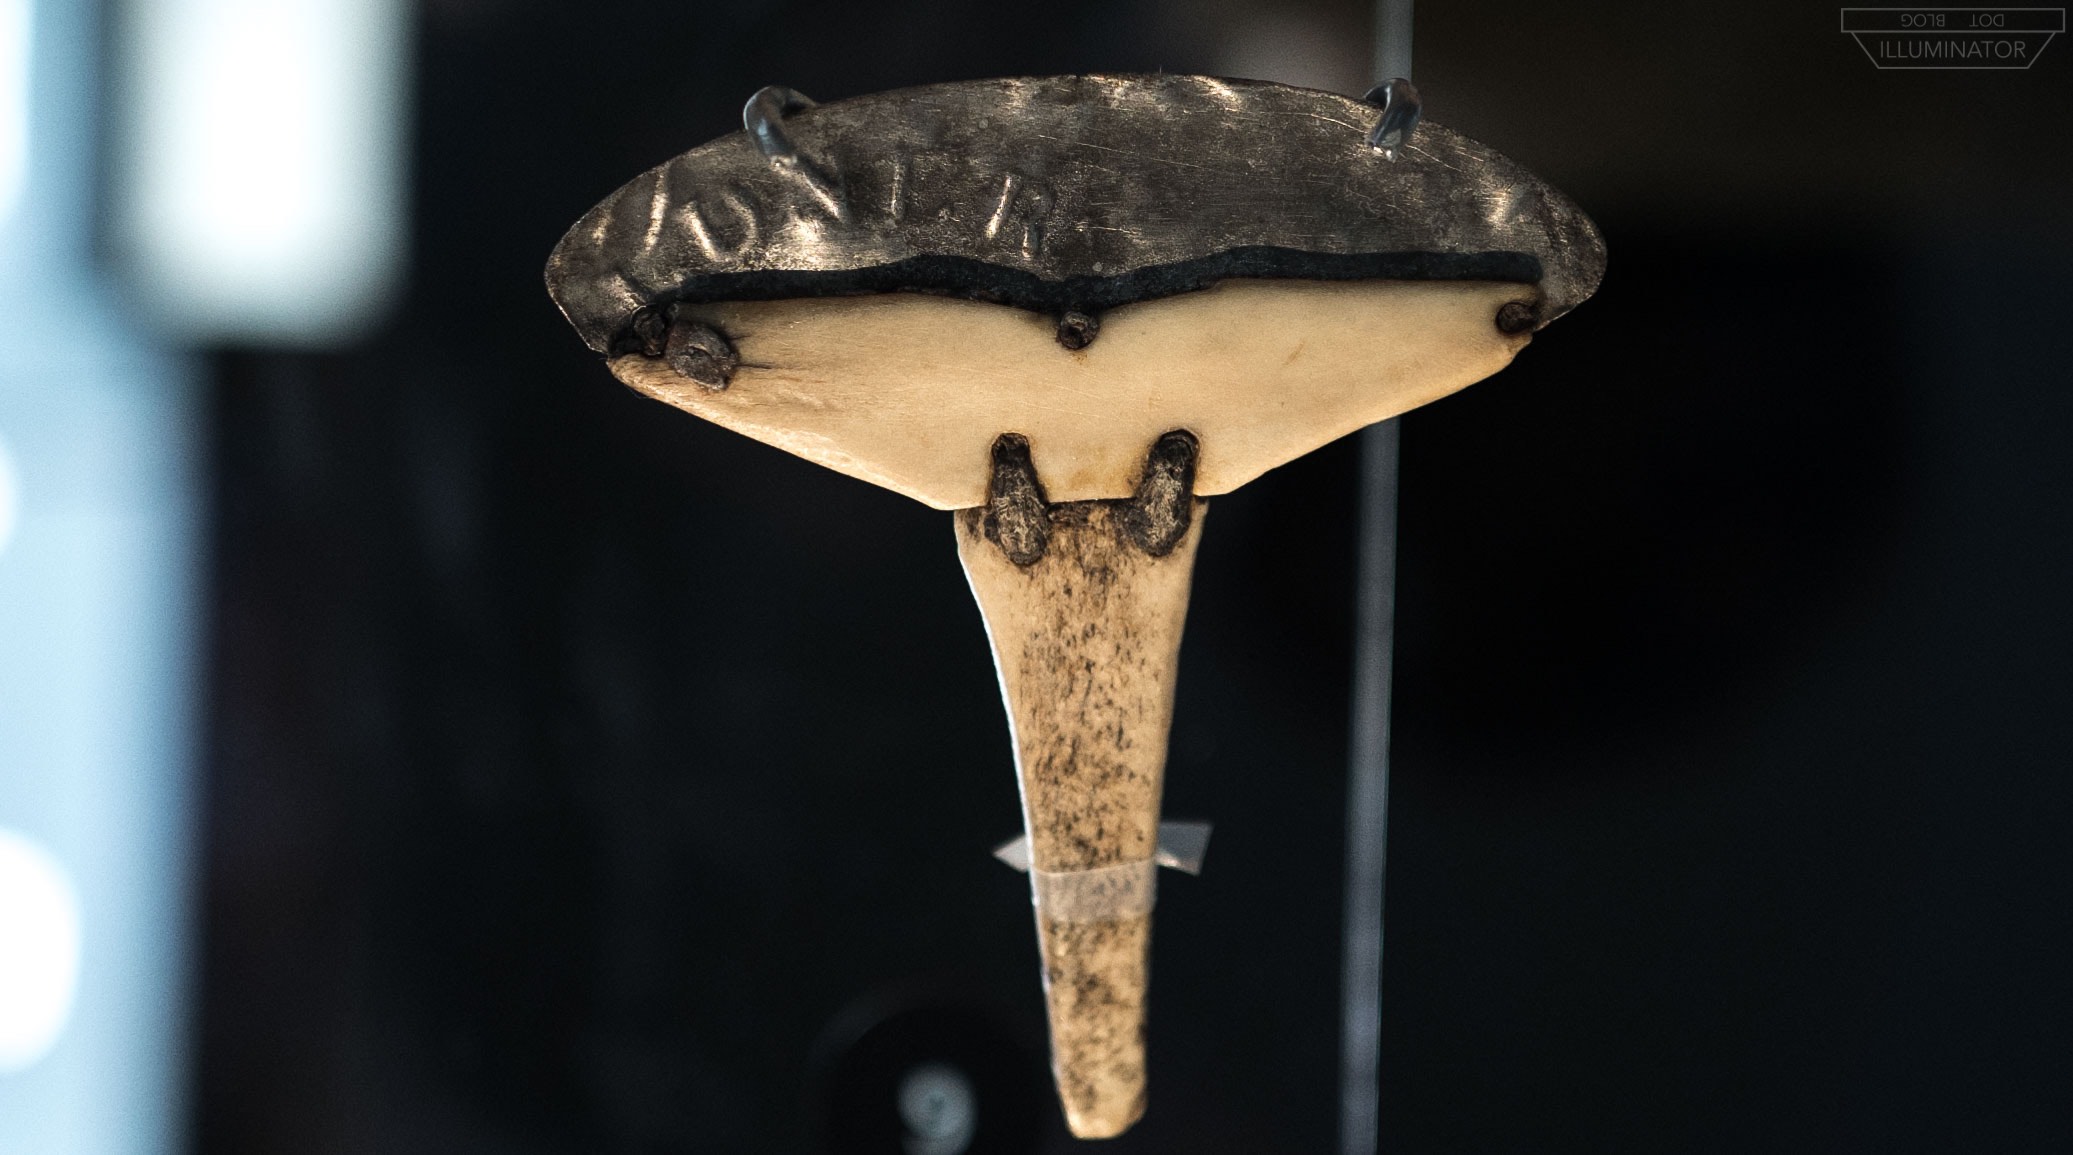
Spear head. (link to Greenwich)
A spear head fashioned by the Inuit from what may have been a spoon. Recovered by the Charles Francis Hall search. Above is a newspaper sketch of Hall’s relics showing the same relic, from Harpers Weekly, October 23, 1869.

Ulu. (link to Greenwich)
Recovered by the Charles Francis Hall search.
Donated to Greenwich’s old Royal Naval Museum by Sophia Cracroft.
Donated to Greenwich’s old Royal Naval Museum by Sophia Cracroft.
As well, in January 2025, Fitzjames researcher Fabiënne Tetteroo spotted that the cup awarded to James Fitzjames has been put on display in the Voyagers gallery (link), on the ground floor by the cafeteria near the entrance from Greenwich Park. The cup was put out by Suzy Jenvey following the bombshell 2024 news that Fitzjames’ jawbone had been identified by DNA at the Erebus Bay Boat Place. [Update: Alex Cross reports that the cup display was replaced with a different exhibit on May 18th, 2025.]
Appendix 2: Corrections.
Thanks to Alexander K. (of hawlantern.blogspot.com) for a correction regarding ice saws and rudders on the Ross-Crozier Antarctic expedition.
A few changes were made on 13 August 2022 on the advice of Claire Warrior. McClintock’s smock and Franklin’s mitten and moccasins have been removed for conservation reasons. The Wildman portrait of James Clark Ross is now the original from the Queen’s House, no longer a facsimile. And the placeholder for Franklin’s medal is now showing the original.
Thanks to Fabiënne Tetteroo for spotting in January 2025 that the cup awarded to Fitzjames had been put on display in the Voyagers gallery (see Appendix 1 above). Thanks to Alex Cross for noting when it was taken off display.
Please send a photo to my email:
(this website, starts with “i”).blog@gmail dot com
Regarding the “E” Pemmican Tin in the main Franklin cabinet: I don’t recall how easy it is to discern the “E” on the back. I’d appreciate anyone sending me a photo of the back of the tin, with their assessment of whether it’s easy to see or hard to see in the cabinet.
Regarding the “E” Pemmican Tin in the main Franklin cabinet: I don’t recall how easy it is to discern the “E” on the back. I’d appreciate anyone sending me a photo of the back of the tin, with their assessment of whether it’s easy to see or hard to see in the cabinet.
Appendix 3: How to enter Polar Worlds.
A note before visiting Polar Worlds: If you enter via the main entrance to the museum (through the arch, between the large anchors), you’ll need to immediately walk across the inner open square, ascend the stairs/elevator at the very back-left of the museum, and then walk through the Tudor/Stuart gallery to reach Polar Worlds’ proper entrance.
This traverse through the Tudor/Stuart gallery first is the only way to enter Polar Worlds by its ‘front door.’ Otherwise, if you cut to the stairs closest to the main entrance, you’ll enter Polar Worlds backwards, starting at the end.
I myself never once had the self-control to enter correctly. I went in through the out door and saw the gallery in reverse every time. :/
– LZ, March 17, 2021.
[Updated 13 Aug 2022. See Appendix 2.]